Table of Contents
So, you’ve built an awesome battery and now you want it to look professional and tidy, so now you need to know how to size battery shrink wrap. Applying shrink wrap can make your battery look great as long as you do it right. It also can provide an additional layer of safety for the lithium battery.
To properly shrink-wrap a battery, you need to measure the length and height of the battery using a ruler or measuring tape. Adding the two measurements will give you the total length of the battery. You should then multiply the total length by 1.1 to account for any overlap or shrinking during the heating process. Once you have determined the appropriate size, choose shrink wrap with a thickness that is suitable for your application.
Cut the shrink wrap to the appropriate length, leaving an additional 1-2 inches on either end to allow for overlap. Once you have the right size, slide the shrink wrap over the battery and use a heat gun to shrink the wrap in place. It is important to heat the shrink wrap evenly and avoid overheating or melting the battery.
In this article, we will cover how to size battery heat shrink wrap. We will also explain the benefits of heat shrinking a battery, and we will also explain how to properly install the shrink wrap.
What Are Heat Shrink Battery Wraps?
Before we get to sizing, let's talk about what heat-shrink battery wraps actually are. Think of them as a jacket for your batteries. Heat shrink battery wraps are made of special materials that are able to shrink in response to a certain level of heat.
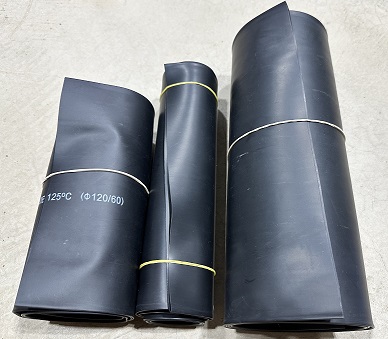
They are specifically designed to shrink down to a certain point and then, from there, provide a strong outer coating to a battery. They come in several different materials, but here we will focus on PVC and rubber 2:1. PVC-type shrink is easier to use however in our opinion 2:1 shrink gives you a better final-looking pack!
Why Use Shrink Wrap on a Battery?
Using heat shrink for batteries is a great way to protect them from damage and ensure their longevity, and in many applications, it's essential. Heat shrink provides a tight, secure fit around the battery, preventing moisture, dust, and other contaminants from entering and causing damage.
Another great thing about battery shrink wrap is that it prevents the battery from getting short-circuited by providing an additional layer of electrical insulation. Also, putting heat shrink wrap on a DIY lithium battery pack makes it look neater and more professional than it would otherwise.
How to Size PVC Battery Shrink Wrap
When it comes to sizing PVC heat shrink wraps, getting the measurements right is super important. You want to make sure the wrap fits your battery like a glove, and here's how you can do that:
- Start by measuring the length of your battery. That's the longer side.
- Next, measure the height (or diameter) of your battery. This is the shorter side that goes around the battery's circumference.
- After that, add the length and height measurements together.
- To make sure the wrap fits perfectly, you'll want to add an extra 10-15% to the total size. This gives you the total size you need for the wrap.
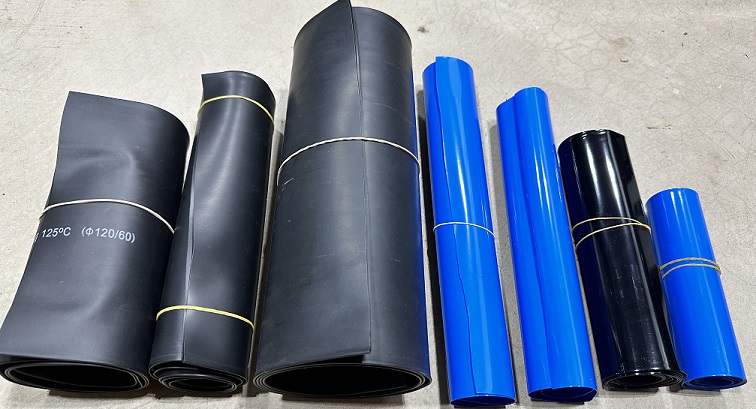
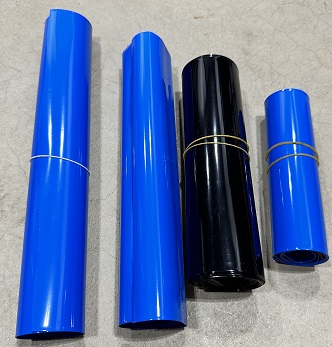 PVC Battery Shrink Wraps
A great store to buy pvc shrink wrap from, with a large inventory of sizes available. Click the link to check out what they have!
Check Sizes
How to Size 2:1 Rubber Battery Shrink Wrap
Sizing rubber 2:1 heat shrink wraps is a bit different from PVC wraps. Since rubber 2:1 wraps require more heat to shrink, you'll want to aim for a slightly tighter initial fit. Here's how to get those measurements just right:
- Start by measuring the length of your battery. That's the distance from the positive terminal to the negative terminal—the long side of the battery.
- Next, measure the height (or diameter) of your battery. This is the distance around the battery's circumference—the short side.
- Now, add the length and height measurements together. This gives you the base size you need for the wrap.
- But here's where things get interesting: Because rubber 2:1 wraps need more heat, you'll want to add only an extra 5-8% to the total size. This smaller percentage ensures a snugger fit, so you won't have to overheat the battery during installation.
And that's all there is to it! With these precise measurements, you'll be able to choose the right size rubber 2:1 heat shrink wrap for your battery. Just slide the wrap onto the battery, carefully apply heat, and watch it shrink down for a cozy, secure fit. Enjoy your battery-wrapping adventures!
NOTE: Whatever size you come up with needs to be the flat side of the battery heat shrink and not the diameter.
 2:1 Rubber Battery Heat Shrink
A great store to buy these from, a large inventory of sizes available. Click the link to check out what they have!
Check Sizes
How To Size Battery Shrink Wrap Length
Ok, so now you know how to size battery shrink wrap so that the girth of your battery fits inside it, but we have not discussed the length. This is somewhat of an opinion, depending on how you want the ends of your battery to look.
If you want the heat shrink to be super close to the perimeter of the battery, exposing most of the battery ends, then you are going to want your piece of heat shrink to be about 1.5cm longer than the battery on each end.
If, however, you want your heat shrink to mostly cover the ends of the battery, leaving just a small portion in the middle exposed, then you would need to make your piece of heat shrink about 4cm longer than the battery on each end.
For rubber 2:1 heat shrink, you can simply cut those figures in half. This will, of course, require some practice, as the amount of shrink depends on both the heat applied and the underlying battery size because the shrink can't shrink any more than that.
Pro Tip: For an ultra-clean finish, do the size calculation for the battery along the perpendicular axis. You will need an additional, much larger piece of heat shrink, but the end result will be a perfectly sealed battery with super neat ends.
How To Apply Battery Shrink Wrap
Once you have your piece of heat shrink properly sized, it's time to apply it.
Notice that the wrap is flat and has two folds. Those folds will form into points once you insert your battery. Make sure those folds are in the corners and not on the sides. Doing this will insure the best fit and make it so there is not a noticeable seam running down the battery.
Take your hand and place it on the end of the battery a few inches from the end you are heating up. Heat the end around all the edges to get the wrap to form around the end. Do this on the other end, so that when you shrink the rest of the wrap, it doesn't pull towards the source of heat and end up shorter than you need it to be.
Once that is done, wave the heat gun side to side in a smooth motion about 6 inches from the battery. Set your view so that it is easy to see a reflected light source on the surface that you are heating. This will allow you to get a better sense of when an area has had enough heat and you need to move on.
Do this for all four sides, and then carefully touch up any loose areas that you may have left. After that, use either scissors or an exacto knife to trim up the ends of the wrap to your liking.
Practice Sizing Your Battery Shrink Wrap
Practice makes perfect, and remember, you have never done this before! So, make sure to buy at least three times the amount of wrap that you think you are going to need, because, well, you are gonna need it.
Also, if possible, try to practice wrapping things that, you know, aren't batteries. The reason I say this is because wrapping something in PVC or rubber 2:1 is a high-heat process. Chances are, on the first couple of times, you are going to use a little more heat than you need to. So, it’s best for these trail runs to happen with something other than a heat-sensitive battery.
What If Something Goes Wrong?
When applying heat shrink, especially if it's PVC heat shrink, it's possible to burn a hole in it. This can happen when you use too much heat in one area and the wrap has become too tight. That last part is crucial. When the wrap shrinks, it's put under pressure. So, the parts of the wrap that are in the middle of the battery have the most pressure on them.
If you apply too much heat to that area, it's bound to melt the wrap. Once that happens, the pressure sort of forces whatever tiny melt hole you made into a larger one. When this happens, the best thing you can do is just trim the ends of the bad wrap and cover it with a new one. You could, of course, strip the old wrap off, but why? Having two wraps on most of the battery would provide better insulation from the outside elements.
This is another reason why it's so important to know how to size battery shrink wrap. If you size the battery wrap too small, it will always be under much more pressure than it normally would have been. This will make it a lot easier to melt open, even if you are not applying too much heat.
Conclusion
Battery wraps are an essential final step in making any great-looking battery. Without prior knowledge and experience, it can be hard to know exactly how much battery heat shrink to use. Sizing heat shrink wrap for batteries requires precision, whether using PVC or rubber 2:1 wraps, but you can do it!
For PVC wraps, measure the battery's length and height, add them together, and increase the total by 10-15% for a snug fit. For rubber 2:1 wraps, follow similar steps, but add only 5-8% to the total size to account for the higher heat required for shrinking. Additionally, consider the desired appearance of the battery ends when determining wrap length. For a close perimeter, add about 1.5cm to each end (0.75cm for rubber 2:1); for more coverage, add about 4cm to each end (2cm for rubber 2:1). Practice is key, so purchase extra wrap and consider practicing on non-battery items to avoid heat damage.
When applying the wrap, ensure the wrap's ends form points in the corners, not on the sides. Heat the wrap's ends first to prevent uneven shrinking, then heat the rest in a smooth motion, watching for reflected light to gauge when to move on. Trim excess wrap as needed. If a hole burns in the wrap, trim the damaged ends and apply a new wrap over the old one for added insulation. Proper sizing is crucial to prevent excessive pressure on the wrap, which can lead to melting. By following these guidelines, you can achieve a secure and well-fitted heat shrink wrap for your battery.
We hope this article helped you learn everything you needed to know about how to size battery shrink wrap, thanks for reading!
Turn the guide into a real build plan
If this article is part of an actual battery, powerwall, or pack-design project, the next step is usually moving from theory into the calculators and planning tools.
Personal Electric Vehicles
If this article sent you down a deeper rabbit hole, the topic page collects the rest of our guides, explainers, and project notes in this category.
Browse Personal Electric Vehicles