Building your own 18650 battery pack is one of the most useful skills in DIY electronics, and it's more approachable than it looks. This guide walks you through a real build from start to finish: sizing the pack for your actual load, picking cells, welding, wiring the BMS, wrapping, and testing. Answer the questions as you go and the guide fills in your numbers for you. Or just read it straight through like a normal article.
Start with what you're powering. Everything else, from cell count to BMS choice, falls out of two numbers: how many watts your load pulls and what voltage it runs at. If you don't know those numbers yet, pick the option closest to your project and we'll use realistic defaults.
Determining Your 18650 Battery Pack Configuration
A pack configuration is written like 7S5P: 7 cell groups in series, 5 cells in parallel per group. Series sets your voltage. Parallel sets your current and capacity. That's the whole system. Everything below is just working out your two numbers.
Series: hitting your voltage
Lithium-ion cells sit at 3.7V nominal, 4.2V full, and about 2.6V dead. You can't build an exact 24V or 48V lithium pack. You build the series count whose range your equipment is happy with.
For a 24V system, that's 7 cells in series: 25.9V nominal, 29.4V fully charged, dying somewhere in the low 20s. Every 24V inverter and appliance I've used lives comfortably in that range. The common targets:
| System | Series | Nominal | Full |
|---|---|---|---|
| 12V | 3S | 11.1V | 12.6V |
| 24V | 7S | 25.9V | 29.4V |
| 36V | 10S | 37V | 42V |
| 48V | 13S | 48.1V | 54.6V |
| 52V | 14S | 51.8V | 58.8V |
More detail on how series wiring works in our series configuration guide.
Parallel: hitting your current
Work backwards from the load. Say you're running a 500W air conditioner through a 24V inverter. Inverters are about 90% efficient, so the battery actually has to supply ~556W. Watts are volts times amps: 556W / 25.9V nominal = about 21.5 amps from the pack.
Divide that by what one cell can safely deliver, its continuous discharge rating (CDR). With 5A-CDR cells: 21.5 / 5 = 4.3 cells. Always round up. That's 5 in parallel, and the build is a 7S5P: 35 cells total.
Two rules that save packs:
- Never max out your cells. If the math says 4.3, five is the minimum, not the target. A sixth parallel cell runs cooler and lasts longer.
- Same logic applies to the inverter. A 500W continuous load wants a 750W+ inverter, because that rating is total throughput, not just output.
More on parallel behavior in our parallel configuration guide.
Choosing Your 18650 Cells
You have two honest paths: new cells or salvaged cells. Both work. What doesn't work is lying to yourself about which one you bought.
New cells. Stick to Panasonic, Samsung, Sanyo, LG, and Molicel. Their datasheets are real and their ratings are honest. As of this writing the highest-capacity 18650 on the market is about 3600mAh, so any listing claiming a "9900mAh 18650" is telling you exactly what kind of seller you're dealing with. Walk away.
Salvaged cells. Laptop packs, scooter packs, modem backups, and medical equipment are full of good 18650s. If you want to harvest your own, our salvaging guide covers it. If you'd rather skip the teardown, we buy most of our cells, new and salvaged, from Battery Hookup. Reputable resellers test samples from every batch and publish the results. Code CS5 gets you 5% off.
Check every cell's voltage before it goes in the pack. When you connect cells in parallel, any voltage difference forces current to rush from the higher cell to the lower one, and the bigger the gap, the faster and hotter that transfer. Keep parallel neighbors within 0.1V of each other. Out-of-balance cells in series won't start a fire, but your BMS will spend days grinding them into balance while your pack underperforms.
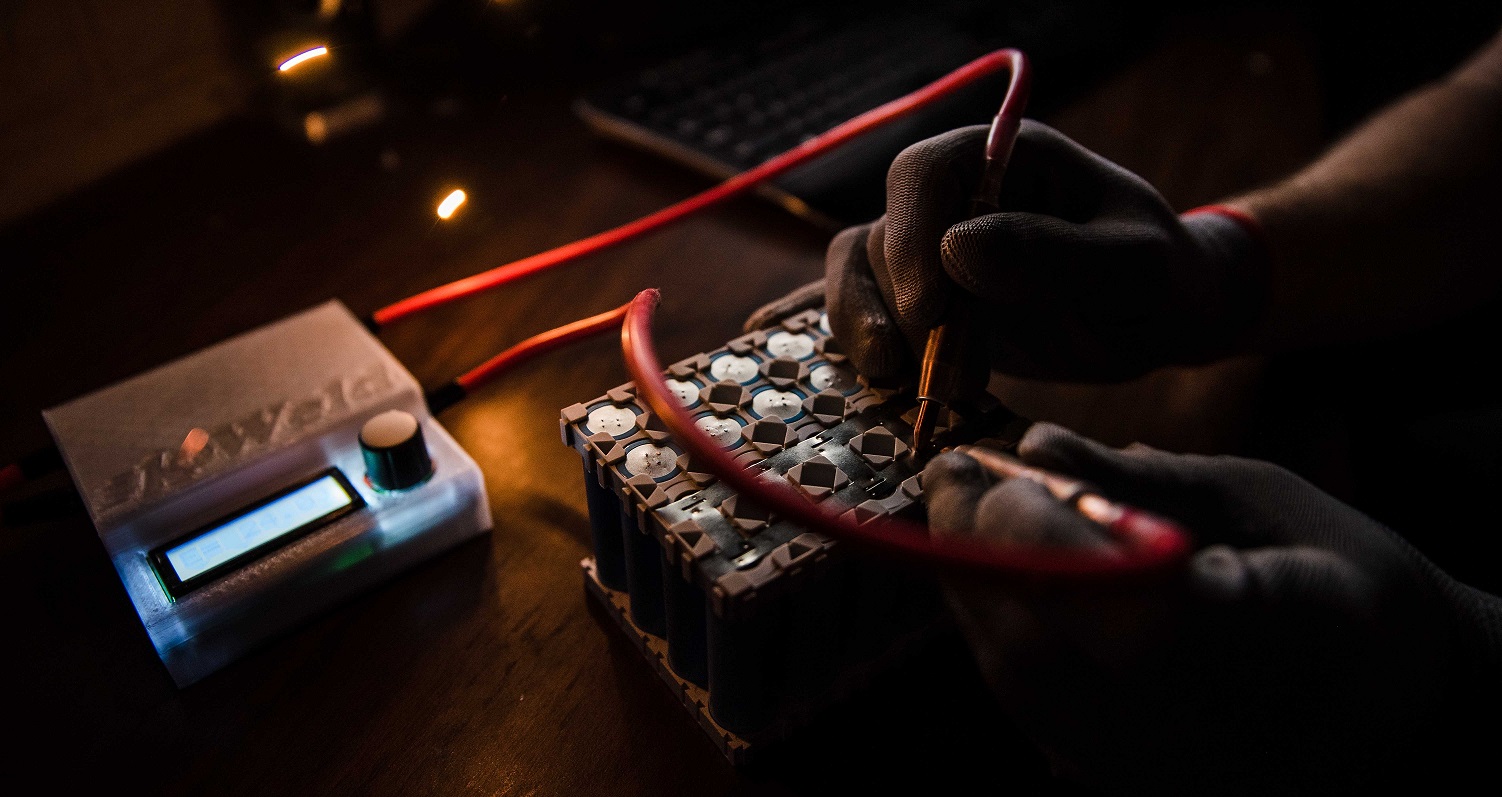
Connecting the Cells: Spot Welding vs. Soldering
Cells get joined with pure nickel strip and a spot welder. Not nickel-plated steel: pure nickel costs a little more and has meaningfully lower resistance, which means less voltage sag, less heat, and a longer-lived pack.
Spot welding is the right way. A weld dumps heat into one tiny point for milliseconds. A soldering iron cooks the whole end of the cell, and heat is how you murder lithium-ion cells. Entry-level welders are shockingly capable now, and we compare the approaches in spot welding vs. soldering. If you truly must solder, our soldering guide shows how to limit the damage: flux, an 80W+ iron, and the shortest contact time you can manage. Hotter iron, less time on the cell. That's the whole trick.
Sizing your nickel: the hobby standard is 0.15mm thick pure nickel, usually 7 to 10mm wide. Most entry-level welders struggle with anything thicker. Pure nickel handles roughly 4 to 5 amps per square millimeter of cross-section, which at 0.15mm thickness works out to about 0.7 amps per millimeter of width. So a single 8mm strip is good for around 5 amps continuous.
Two things make that number workable. First, in a properly built pack, only the series bridges carry the full pack current; the parallel connections within a group see an amp or so. Size for your series links. Second, if one strip isn't enough, weld a second layer directly on top: doubling the cross-section doubles the capacity.
For high-current builds where nickel alone can't keep up, a copper-nickel sandwich is the proven upgrade path.
Practice first. Weld some strip onto a dead cell and try to tear it off. If it peels away easily, turn the current up. If you're fighting it, you're ready. Full technique in our spot welding guide.
Choosing a BMS
A bare series string of lithium cells is technically a battery and practically a hazard. The BMS (battery management system) is the small board that makes it safe: it stops charging when any group hits 4.2V, cuts output when any group sags too low, limits current, kills shorts, and bleeds down high cells to keep the groups balanced. Most consumer boards top-balance, trimming the high groups during charge; some systems bottom-balance instead so the groups hit empty together. Either way the BMS handles it.
Buy the BMS for your series count and your maximum current, with headroom on both.
Want to compare options side by side? The BMS Picker walks you through it. Deeper background in how to choose a BMS.
Frame and Cell Holders
Use cell holders. They space the cells for cooling, they make thermal runaway less likely to jump cell to cell, and they turn a wobbly tape-and-glue brick into a rigid pack that shrugs off vibration.
Snap the holders into the footprint your configuration needs, then load cells with parallel groups alternating orientation: first group positive-up, second group negative-up, and so on down the line. That alternation is what makes your series bridges short and clean.
Want a frame that exactly fits this build? Generate a 3D-printable frame for your pack:
Assembly: Building the Pack
Step 1: Prep. Clear every loose screw, wrench, and strip of metal off your bench. Stick insulator rings on the positive end of every cell. Verify every cell's voltage one last time.
Step 2: Weld. Lay nickel strip across each parallel group so it covers every terminal, and leave about 10mm hanging off the end of each group. Those tails become your BMS sense connections. Then cut short bridge strips and weld the series connections: negative of group one to positive of group two, and so on down the pack. Series bridges only span adjacent groups. A strip running the full length of the pack isn't a connection, it's a short. Mask exposed conductors with Kapton as you go. A dropped screwdriver on a live pack ruins more than your day.
Step 3: Wire the BMS. The convention:
- B- goes to the main battery negative
- P- goes to your discharge connector's negative
- Battery positive runs straight to the discharge connector's positive
- If your BMS has a separate C- port, that's the charge connector's negative
Then the balance leads. Start at the most negative wire: it lands on main battery negative. Each next lead lands on each next group junction. If you wired it right, the last lead lands on main battery positive with none left over. Full walkthrough with photos in wiring balance leads.
No output voltage after wiring? Don't panic yet. Most BMS boards ship asleep and wake when they see a charger. Life hack: on about 90% of boards, briefly shorting B- to P- mimics that charge signal and wakes the BMS. No meaningful current flows.
Wrapping and Protecting the Pack
Tape down every wire. Then armor the pack in barley paper (fish paper) on all sides. Done right, the pack should look like it's made of paper before any heat shrink goes on.
Heat shrink sizing is a simple formula: add the pack's width and height, then add 10%. A pack 100mm wide and 70mm tall needs shrink with a flat width near (100 + 70) x 1.1 = 187mm.
Testing and First Charge
Don't skip this. Ten minutes with a multimeter is the difference between a battery and an incident report.
- Check every group voltage at the balance connector. All groups should read within ~0.05V of each other. One group reading zero means a missed weld or a backwards cell. Find it now.
- Verify pack voltage at the output matches groups x group voltage.
- First charge supervised, on a fireproof surface. Use a CC/CV charger rated for your series count and watch the first full cycle. The BMS should taper and cut off at 4.2V per group.
- Verify capacity under a real load before you trust the pack with anything expensive.
Your Build Plan
Everything you chose, in one place: configuration, cell count, cell choice, BMS, strip width, heat shrink size, and charger, plus the full shopping list and a printable build checklist.
Before your first build, read our lithium battery safety guide. Seriously.
FAQ
How many 18650 cells do I need?
Series count x parallel count. A 24V pack running a 500W load needs 7S5P, which is 35 cells. Use the configurator above and it does the math for your load.
Can I mix cells with different capacities?
Not in a simple build. Mismatched cells age unevenly and drag the pack down to the weakest group. If you're working with tested salvaged cells of varying capacity, our Pack Builder arranges them so every parallel group totals the same capacity.
Do I really need a BMS?
Yes. A pack without one has no overcharge, over-discharge, or short protection. The only common exception is competition car audio, and that world doesn't use 18650s at all. It runs headway-style cells with balancer chargers; see the car audio calculator.
Can I solder instead of spot welding?
You can, and you shouldn't. Sustained soldering heat degrades cells. If it's your only option, use a hot iron (80W+), flux, and minimal contact time.
Is it cheaper to build than buy?
Usually, and dramatically so with salvaged cells. But the real reasons are fit and quality: you get exactly the voltage, capacity, and shape you need, built with cells you verified yourself.
How long does a DIY 18650 pack last?
Quality cells kept between roughly 20% and 90% charge and never over-drawn commonly deliver 500+ full cycles before noticeable fade. Heat and sustained max current are what shorten that.