Table of Contents
If you want to be able to build a powerful, compact, high-current battery, then you are going to need to know how to spot-weld a copper-nickel sandwich. Nickel is usually used as the main conductor for building lithium-ion batteries. Nickel, however, is much less conductive than copper. This means to get large currents out of a battery nickel battery, the battery needs to have many cells in parallel and many layers of nickel.
In contrast, a copper battery requires much less material to produce the same currents. This means that fewer cells can be used (so long as they still support the current) as less material is needed between the cells to extract the required amount of energy.
Copper Vs Nickel For Spot Welding Lithium Ion Batteries
A lithium-ion battery can be constructed with either nickel or copper as the main conductor. Nickel has anti-corrosion properties and is easy to weld. In contrast, copper will readily corrode and it's difficult to weld. In fact, copper is so difficult to weld that it can't be welded directly with most spot welders.
This is because spot welders depend on a particular connection resistance to be able to form a weld. As the connection resistance lowers, more power is required to perform a good weld. Copper has a very low resistance, so for this reason you need a very powerful welder to be able to weld copper. We did a write-up on the best spot welders on that list you will find some that can handle higher power requirements.
Why Is Copper Used To Build Batteries?
Copper has a much lower resistance and is therefore the more desired metal to use when building a battery. A lower resistance produces a lower voltage drop under load. The problem is that copper has such a low resistance that most spot welders are simply not powerful enough to be able to weld it. This is why the copper-nickel sandwich was invented.
This chart compares the conductivity of other metals to copper. On this chart, a metal rated as 50 would be half as conductive as copper and a metal rated as 120 would be 20% more conductive than copper.

As you can see, nickel is only 24% as conductive as copper. This means that if you want to build a high-current battery, you will either need to use a lot of nickel or learn how to do a copper-nickel sandwich.
If you compare a piece of copper strip and a piece of nickel strip of the same exact size and thickness, the nickel strip will have 5 times as much resistance and therefore can carry only a fifth of the current that an equally sized piece of copper can.
The only alternative to doing a copper-nickel sandwich is to apply many layers of nickel. While it’s true that this is a brute force approach if you are using enough cells in parallel and layer enough nickel, the end result is the same as using copper. It’s just not always practical as it adds weight and more points of failure plus it can get expensive quickly.
What Is Voltage Drop?
Voltage drop is how much the voltage will drop as a result of current flowing through a conductor. All materials have a characteristic resistance. This intrinsic resistance governs the flow of current through all materials. Metals have a very low resistance, which is why we use them as wires, connectors, plugs, etc. Rubbers, plastics, and wood (and by extension, paper) have very high resistance. This is why they are used as insulators.
Voltage drop is proportional to the amount of current flowing through a given conductor that has a given resistance. This means that if the voltage drops by 1 volt under a 10 amp load, then it will drop by 2 volts under a 20 amp load. The amount of power that is wasted by voltage drop can be calculated using ohm's law:
That's a lot of power to dissipate from a wire! This is why wires and connectors that are overloaded produce heat. In this product of heat their resistance increases, causing a dangerous cycle to begin. To avoid this kind of issue, you want to make sure to use the right size wire. A wire twice as thick would have half the resistance and would produce half the voltage drop.
When it comes to building batteries, the materials used are usually 0.1mm to 0.15mm thick and 20mm to 50mm wide. A piece of copper about that size will generally have a voltage drop of about 1mv (1/1000th of a volt) which is a much smaller voltage drop than the example above. These voltage drops are added together for each series connection in a battery pack. It's also important to consider that the higher the current, the higher the voltage drop.
The same-sized piece of nickel will have a voltage drop of about 5mv. Still a very low number but five times more than copper. Any added voltage drop will reduce performance, cause more heat build-up, and reduce the overall lifespan of the battery.
An ebike battery pulling 50 to 80 amps places a very high load on the internal connections that form the battery pack. For this reason, it’s common to seek an ebike battery spot welded using the copper-nickel sandwich method.
If you are wondering how to spot-weld a copper-nickel sandwich and you realize that your welder is not powerful enough, there is good news. There is a method that uses tinned copper braid to create connections that are just as good as a copper-nickel sandwich. So, if you don’t have a kWeld or other high-power welder, don’t worry.
There are things that you can do to make a battery just as good or even better than a battery made with the copper-nickel sandwich technique. You can scroll past the guide below to learn about this copper-nickel sandwich alternative.
What Is A Copper Nickel Sandwich
A copper-nickel sandwich is a method used to attach pure copper to lithium-ion cells. A small piece of nickel is placed above the copper above the cell intending to be welded. The welding is done from the top where the welding current enters into the nickel, then into the copper, then back into the nickel, and finally back out through the other welding electrode.
It’s important for the series connections in a battery to be able to handle a lot of power. This is because the full power of the load flows through each and every series connection. In contrast, the parallel connections (conductor between cells of the same group) experiences the load current divided by the number of cells in parallel.
So, if you are running a 50A load and you have a 10S4P battery, each parallel connection is only seeing 12.5A. Each series connection sees a full load current of 50 amps.
In another example, if you have a 20A load and you are using a 4S10P battery, then each cell will only see 2A of current at full load. Knowing this is useful and will help you better determine the most suitable shape to cut your copper into. Because of this, batteries made with the copper-nickel sandwich method generally are in shapes that maximize the amount of material between the cell groups.
Tools And Supplies To Spot Weld A Copper Nickel Sandwich
Not just any welder can spot weld a copper-nickel sandwich. Even though you are not welding the copper directly, it still takes a substantial amount of power to perform the weld.
Even with a welder like the kWeld, you will have great difficulty trying to figure out how to spot weld a copper-nickel sandwich if you are using copper any thicker than 0.15mm and anything approaching .2mm is impossible. For that reason, it's best to use 0.1mm thick copper sheet when spot welding a copper-nickel sandwich.
- Kweld or other high-performance welders
- 0.15mm nickel strip
- 0.1mm copper strip
- Masking Tape
How To Spot Weld A Copper Nickel Sandwich
The first step is to cut the pieces of copper and nickel to the right shape. Remember, when using small nickel squares, you won't be carrying any current with the nickel. In this layout, nickel is simply used to perform the welds.
All of the current will be carried through the copper. Later on in the article, however, we will explain how it's best to use full pieces of nickel when welding a copper-nickel sandwich. In most cases, however, that is not required. This is because copper is such a good conductor that most batteries don't need the extra layer of nickel.
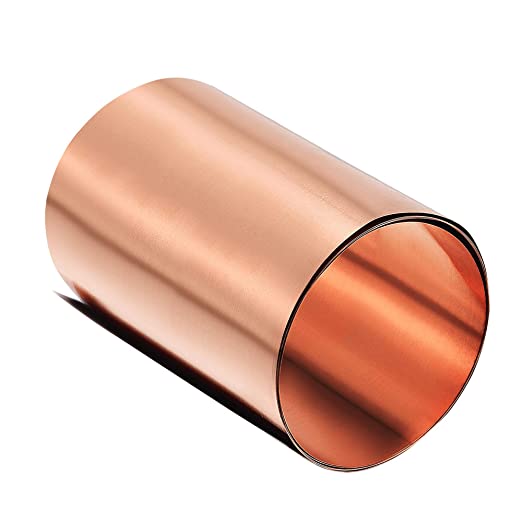 Copper Sheet .1mm
Best copper sheet to use for doing copper/nickel sandwich. Can be cut easily with scissors.
Check Price
Step 1: Cut the copper into the same shape that you would normally cut the nickel into.
Step 2: Cut the nickel up into small squares
Step 3: Lay the copper on top of the cells where it needs to go by taking a small nickel square and placing it directly on top of the cell you intended to weld to.
NOTE: This can be difficult as you can’t see through the copper. A common solution to this problem is to press the copper down onto the cells. Remember, copper is a rather soft material. So, as you press the copper into the cells, the shape of the cells is imprinted on the underside of the copper. The copper is thin enough so that those impressions are easily viewable from the other side.
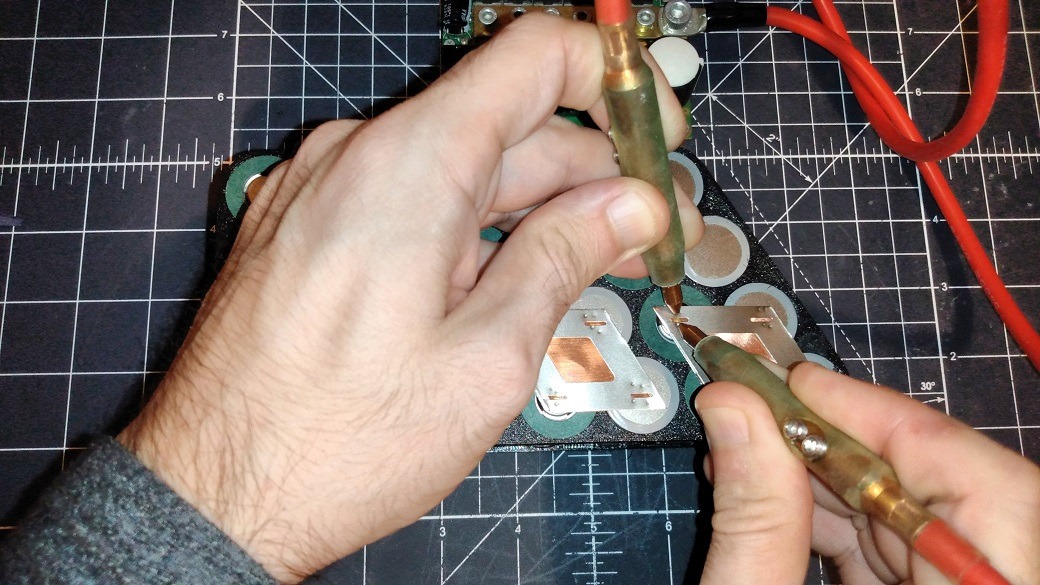
Step 4: Regardless of how you do it, once everything’s all lined up, attach the electrodes to the small nickel square and perform the weld.
Remember to set your welder power to at least 75 joules. Also, it's really good to keep a metal scrub brush near your work area so that you can periodically clean the tips of your welder electrodes. Doing this ensures that you can make a consistent, high-quality weld every time.
The amount of pressure needed to do any good spot weld is sort of tricky. If you don’t press enough, there will be a massive connection resistance and it will just pop and you won’t get a good weld if at all. If you are pressing too much, you lower the junction resistance to the point where the weld area does not heat up enough to form a strong bond.
When doing a copper-nickel sandwich, you want the welds to look somewhat overdone but not burnt. The welds need to look a little more cooked than a normal nickel weld because much more power is required to weld copper, especially through a layer of nickel.
Pro Tip: One technique to get the weld pressure right is to build the battery on a scale. Pay attention to how many pounds of pressure you are using when you get a good weld. Then, for each subsequent weld, you can look at the scale to know when you are in a good pressure range to do the weld. This method helps ensure a consistent weld each and every time.
NOTE: Quite a bit of power is required to weld a copper-nickel sandwich. So, make sure to set your kWeld to at least 75 joules.
Remember, there is no BMS to protect you when the battery is in this phase of construction. That means that if you drop even just a single piece of copper, nickel, pair of scissors, or anything else conductive on a battery that you are building, you are almost certainly in for fireworks.
This is why it’s so important to use masking tape to cover the areas of the battery that you have either already finished or have not worked on yet. Sure, it’s annoying to have to change the tape periodically as you work, but it’s worth it. If you mask off those areas, the risk of fire is drastically reduced in the event that something conductive gets dropped on the battery before it's wrapped up.
Using copper instead of nickel means you can transfer a lot more current from the cells to your load while using the least amount of material. Just about all consumer-grade welders are not powerful enough to directly weld copper. This is why small pieces of nickel are needed to form the welds.
The idea is to ‘sandwich’ the copper between small pieces of nickel and the cells. Welding this stack together makes it so that high-current copper batteries can be produced with a common spot welder.
NOTE: You’ve got to make sure your metals are flat. And I mean very flat. Even just a significant amount of dust can create an air gap that will be large enough for form an extremely high resistance junction. In these cases, you will end up just blasting bits of metal across the room and that comes along with scary popping sounds and bright flashes. In a worst-case scenario, a poor enough weld at a high enough power could even blow a hole through the cell.
That’s why it is of crucial importance to ensure that the copper is placed perfectly flat on the cells and the nickel has to be placed perfectly flat on the copper. All surfaces must be in full flat contact before trying to do a copper-nickel sandwich.
There is a trend among battery builders where they try to use as little nickel as possible when doing a copper-nickel sandwich. It is popular to think that adding more nickel will increase the resistance of the connection.
This is not the case. In fact, adding any more material in parallel can only lower the overall resistance of the composite conductor. This misconception seems to be based on how the battery looks rather than how it works. But remember, just because less copper is visible doesn’t mean that the battery has a higher resistance. In fact, the opposite is true.
So instead of using tiny nickel squares to weld the copper to the cells, feel free to use standard-sized pieces of nickel.
Doing it this way makes it a lot easier to hit the cell when doing the weld because the standard-cut nickel cell connection rolls and strips that you can buy will line right up. This is helpful because copper is not transparent. If it was, then it would be easier to add those little nickel squares.
The good news is that using more layers of nickel and/or various other materials not only makes building the battery easier, but it can even make it a better battery by lowering the overall resistance of the connections between cell groups.
Is There A Copper Nickel Sandwich Alternative?
Yes. And you don’t need a kWeld to do it. There are other materials and techniques that you can use to build a battery that is just as good - or even better - than a battery made with a copper-nickel sandwich method. There exists on the market a highly conductive, corrosion-proof material that is excellent for making high-current batteries.
Tinned copper braid is used widely in many industries for various purposes. Copper braid is used to make electrical devices used in the mining industry as well as being used as a flexible junction in an otherwise rigid circuit. You can also find copper braid being employed in marine industries.
It’s used commonly as ground connections for houses and automobiles and it's used in solder wicks. Unlike copper sheets or strips, tinned copper braid has a coating that prevents corrosion without reducing conductivity.
The best part is that it doesn't take a high-powered spot welder to make a copper-braided battery. This is because copper braid is flexible and has a much higher surface area than sheet metals. Because of these factors, all it takes is a little pressure to get a great connection.
Here is a standard nickel welded battery that can be produced with just about any welder:
Here is the same battery with tinned copper braid clamp-welded to the nickel. I say clamp welded because the braid is held down to the conductor by the nickel on top of it that is welded to the nickel below. So it's a nickel-braid-nickel sandwich.
Using this method with this size braid yields a resistance that is only 20% higher than pure copper and about 4 times less than nickel alone. Results will vary based on the size and shape of the conductive paths and how wide of a tinned copper braid you use. The braid in the example above is just a quarter inch.
The same reduction in resistance can be achieved with nickel alone, but it would take many layers of nickel to equal the amount of resistance reduction that can be achieved with just 2 pieces of nickel and a single piece of tinned copper braid.
With a slightly wider braid or two braids per conductive path, a lower-than-pure-copper resistance can be achieved without having to own a powerful spot welded that can handle copper.
Conclusion
Anyone building batteries for long enough will eventually search for how to do a copper-nickel sandwich. Copper is the ideal battery-building material as it has an extremely low resistance. Copper is not the lowest-resistance metal in the world, but it does have the lowest resistance-to-cost ratio. As long as you have a powerful welder such as the kWeld, a copper-nickel sandwich is pretty straightforward.
To do a copper-nickel sandwich, all you have to do is cut the copper the same way you would normally cut the nickel. Then, cut the nickel into small squares. Place the copper on top of the cells and then place a small nickel square on top of the cell you intend to weld to. Make sure your welder is set to at least 75 joules, and then perform the weld. If all goes well, you should have a high-quality copper-welded connection. And remember, if you don’t have a welder that can weld a copper-nickel sandwich, you can always try the nickel and braid method mentioned above.
We hope this article helped you learn how to weld a copper-nickel sandwich, thanks for reading!
Turn the guide into a real build plan
If this article is part of an actual battery, powerwall, or pack-design project, the next step is usually moving from theory into the calculators and planning tools.
Battery Storage
If this article sent you down a deeper rabbit hole, the topic page collects the rest of our guides, explainers, and project notes in this category.
Browse Battery Storage