Table of Contents
Lithium-ion batteries power our modern world. From cell phones to laptops, from smartwatches to electric cars, lithium-ion batteries can be found at the heart of it all.
In many applications, more than one lithium-ion cell is used. Also, more often than not, when a battery pack 'goes bad', only a single cell group and sometimes even a single cell is to blame. So, that means there are many devices out there that have perfectly good lithium-ion cells hidden inside.
If you are not familiar with lithium-ion cells and how they work, harvesting them from old electronics can be dangerous. Also, good lithium-ion cells aren’t of much use if you don’t know how to charge them and don’t know what kind of things you can do with them. In this article, we will cover what lithium-ion cells are and where to find them.
We will also go over how to remove, test, sort, and charge salvaged 18650 cells. Let's get started!
What You'll Need To Salvage 18650 Cells And Test Them
Anyone who is determined enough will be able to tear down a lithium-ion battery pack. But if you have a few basic tools, it will make the process a whole lot easier. So, we made a convenient list of Amazon items that contains everything you need to salvage and test 18650 cells.
- Multimeter
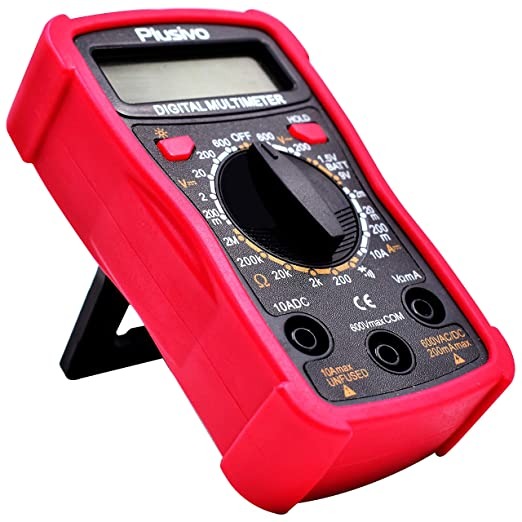 Multimeter
Measures AC & DC current. Backlit display. Ability to retain the last measured value.
Check price
- Battery Charger & Tester
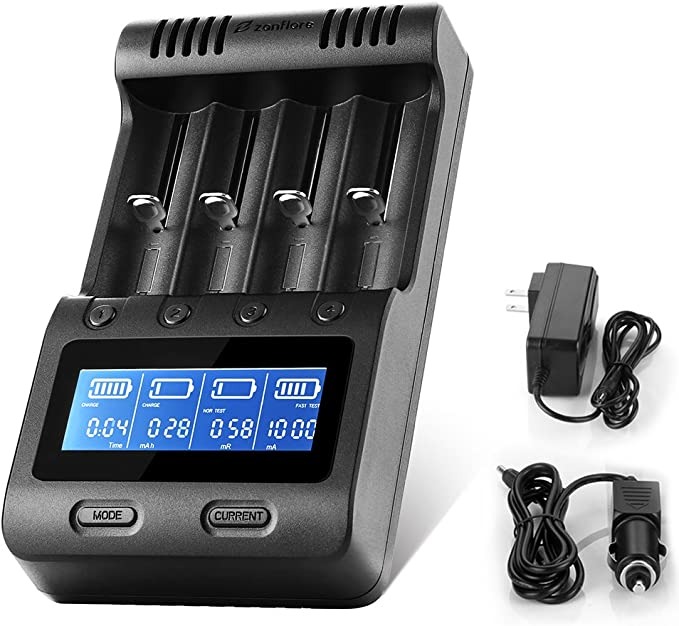 Zanflare 4 Bay Charger
Universal 4-bay charger & tester for most cylindrical cell sizes & chemistries. Has an LCD display.
Check price
- 5 Pack of Flush Cut Pliers
 Flush Cutters
5 pack of flush cut pliers. Perfect for removing the nickel strip that is attached to cells when salvaging.
Check price
- Heavy Duty Box Cutter
 Box Cutters
2 pack heavy-duty, rubber-gripped utility knife. Retractable and adjustable blade.
Check price
- Screwdriver with Phillips, Slotted, Torx, and Square bits
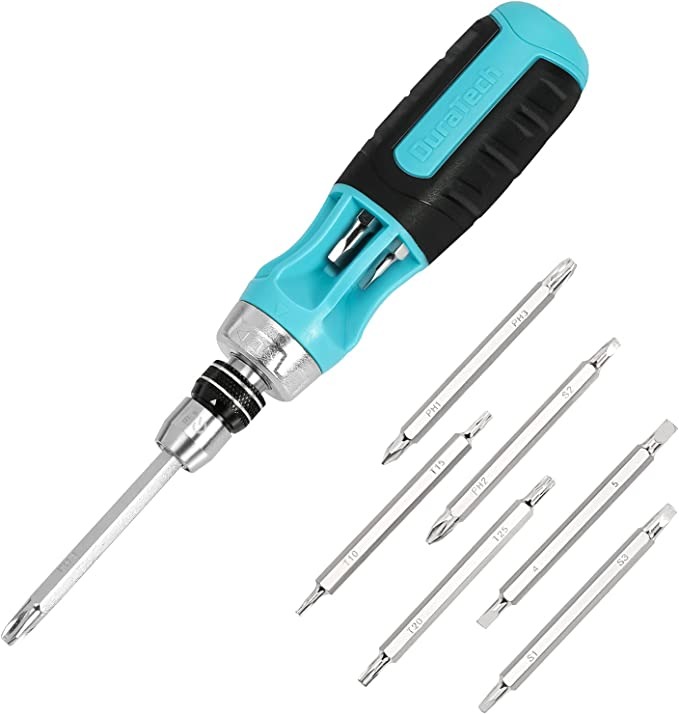 Screwdriver
12 in 1 ratcheting screwdriver. Comes with Phillips, Slotted, Torx, and square bits. Crucial for opening salvaged battery packs.
Check price
- Safety/Work Gloves
 12 Pack Safety Gloves
12 pack of gripped safety gloves. When working with sharp nickel on salvaged lithium ion cells, you're going to want to wear safety gloves to minimize cuts.
Check price
- Load Resistors
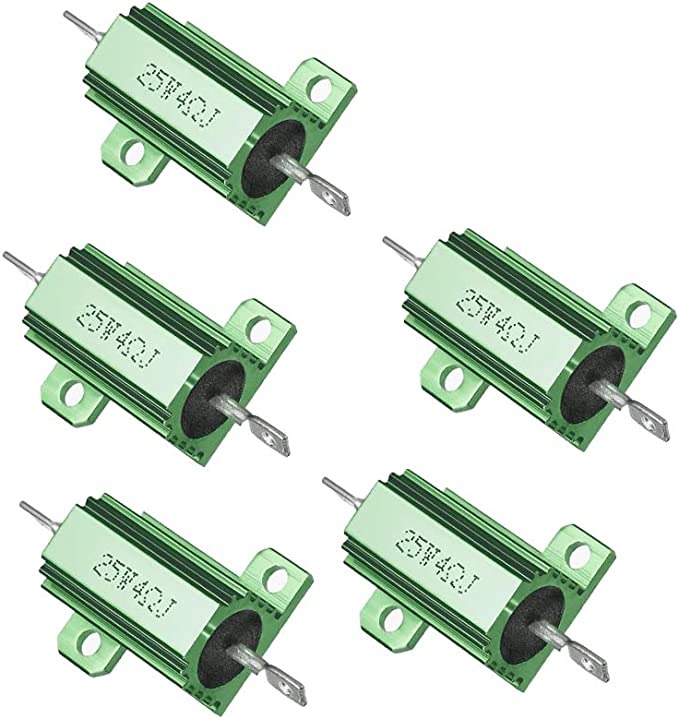 Load Resistors Check price
- Internal Resistance Meter
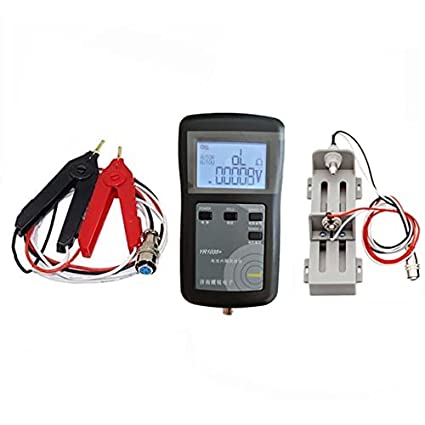 YR1035+ Internal Resistance Meter
The better of the two options when it comes to testing IR. Digital LCD screen. Super accurate tester.
Check price
Terms Associated With Salvaging 18650
Cells Before we get started, I would like to take the time to familiarize you with some of the terminology associated with salvaging lithium-ion cells.
Nickel Strip
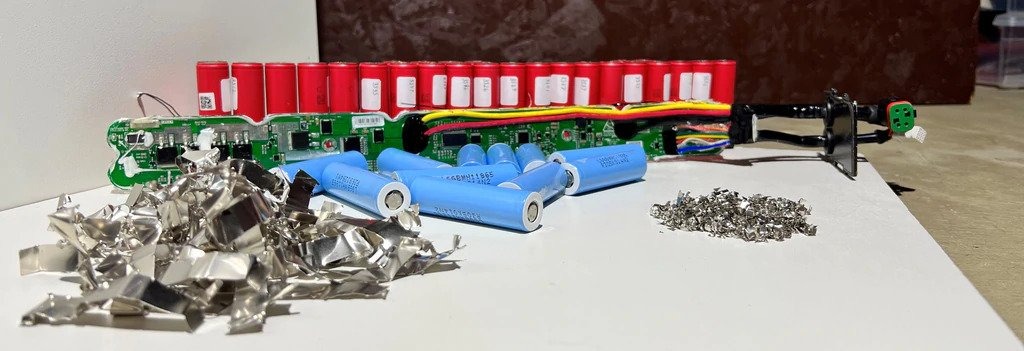
Nickel strip is the material that is commonly used to build lithium-ion battery packs. This is because nickel works well enough as a conductor and well enough with low-cost spot welders to be the most economically viable solution. This stuff is very sharp and can be rather tuff to remove from a cell if you don’t use the right method.
BMS
Or Battery management system is a circuit board that manages a lithium battery pack. It protects the battery and its cells from operating outside of predefined settings to keep the pack safe. Another feature of BMSs is they work to keep a lithium battery pack in balance so it will last longer.
Charge Rating
A lithium-ion cell’s ability to take a charge is rated in terms of C. 1C is the cell's capacity. So, if you have a 3000mah (3aH) and its datasheet recommends using a 0.5C charging rate, then you should charge the cell at 1500 milliamps (1.5 Amps). Milliamp Hours A cell’s milliamp Hour rating is its capacity. There is 1000 mA in 1 Amp. So, if you have a 3000ma cell, that cell can provide 3 amps over the course of 1 hour. It could also provide 1.5 amps over the course of two hours, and so on. Using ohm’s law, all you have to do is multiply the cell’s nominal voltage by its rated capacity in amps, and you will be able to find out how many watts you can get out of the cell. So a 2200ma cell can do 2.2 amps in an hour. Over the course of that hour, its nominal voltage will be about 3.7 volts. 3.7 volts times 2.2 amps is 8.14Wh.
Load
The load is what you are powering with the battery. From the perspective of any power supply, the load is the output. Later in this article, we will cover using a load resistor (which is pretty much a fixed, dummy load) to test the internal resistance of your salvaged lithium-ion cells.
Charge Current
Charge current is how many amps you send to the battery during its constant current charge phase. The actual current being delivered to the cell at any given moment will vary widely depending on the cell’s state of charge.
Resistance
Electrical resistance is exactly what it sounds like. It's the measurement of how difficult it is for electricity to pass a given point. As resistance goes up, electrical conductivity goes down.
ISR/ESR Internal Series Resistance (IR)
Unlike capacitors, all batteries have some form of internal resistance. This is because batteries store their energy in reversible chemical reactions rather than an electric field. ISR, also known as ESR (Equivalent Series Resistance), is an electrical resistance that occurs as the effect of the chemistry used to make a battery and its SoC (State of Health). The more worn out a lithium-ion cell is, the higher its internal series resistance (IR) will be.
Where Can I Find Lithium Ion Cells to Salvage?
All over the place! Lithium-ion batteries are by far the most common type of battery used in electronics. While there are many different types of lithium-ion batteries, they filter down into two basic categories. Lithium-ion cells and lithium polymer pouches. You will find plenty of lithium polymer pouches in phones and tablets and GPS systems. Power banks will generally have lithium-ion cells, while portable speakers could have either or. Usually, a small portable speaker will use a lithium polymer pouch and larger speaker systems will use cells. Break old electronics up and see what you find! Make sure to recycle what you can.
Where To Find Reclaimed 18650 Lithium Ion Cells?
While many devices use 18650 cells, old scooter battery packs are going to be your best bet. This is because scooter battery packs contain a high number of 18650 cells. It’s important to note that if a scooter battery pack is discarded, there is a chance that a few of the cells are going to be bad. Modem and medical battery packs are also a great sources of high-quality reclaimed cells. This is because the wear level of a cell is a function of several variables, one of which is how many times the cell is cycled. In most Western countries, grid power delivery is pretty reliable. So that means any lithium-ion battery that was used as a battery backup has more than likely only been cycled a handful of times if they have been cycled at all.
When it comes to a local, domestic source for salvaging 18650 cells, old laptops are going to be your easiest source. You can check to see if your local recycling center or junkyard sells to the public, and if they do, you will be able to buy bad laptop battery packs by the pound and some really unbelievable prices. If that is not an option, there is always checking around the house and asking friends and family. You would be surprised how many people have old laptops and their batteries just sitting around collecting dust. Another thing you can do is check places like Facebook Marketplace and Craigslist. It's not too uncommon to see free electronics junk on websites like that. We also have an article where we go more in-depth about where to find 18650 lithium-ion cells.
Can Salvaged 18650s Be Reliably Reused?
Yes! Remember, it's usually just 1 or 2 cells that are bad or degraded in most battery packs. The built-in safety circuit a BMS in the battery that shuts the entire pack off when even just one cell reaches a fault condition. So, that means that the rest of the cells are probably just fine. If you want to make sure that the salvaged 18650 cells you have are up to snuff for your use case, learn how to test and grade your salvaged cells.
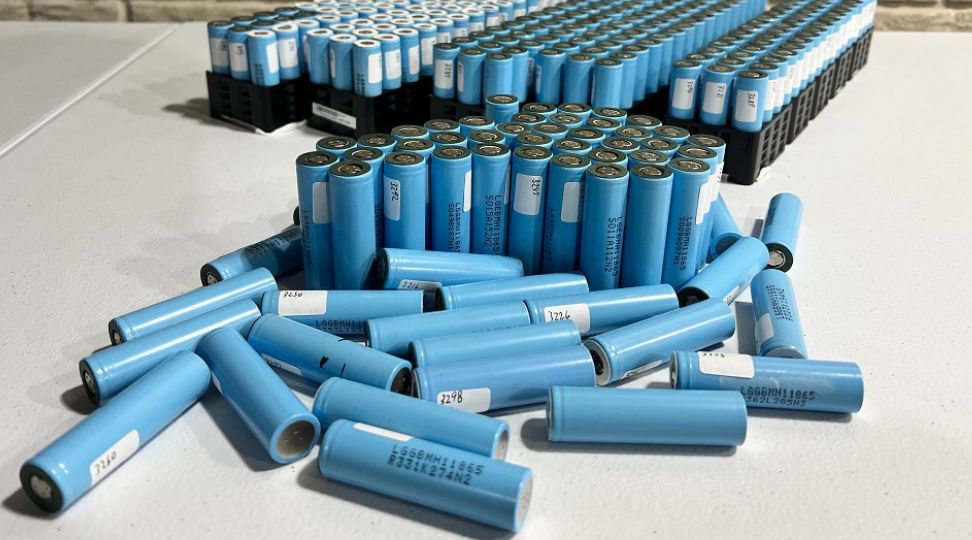
Salvaging 18650 Lithium Ion Cells
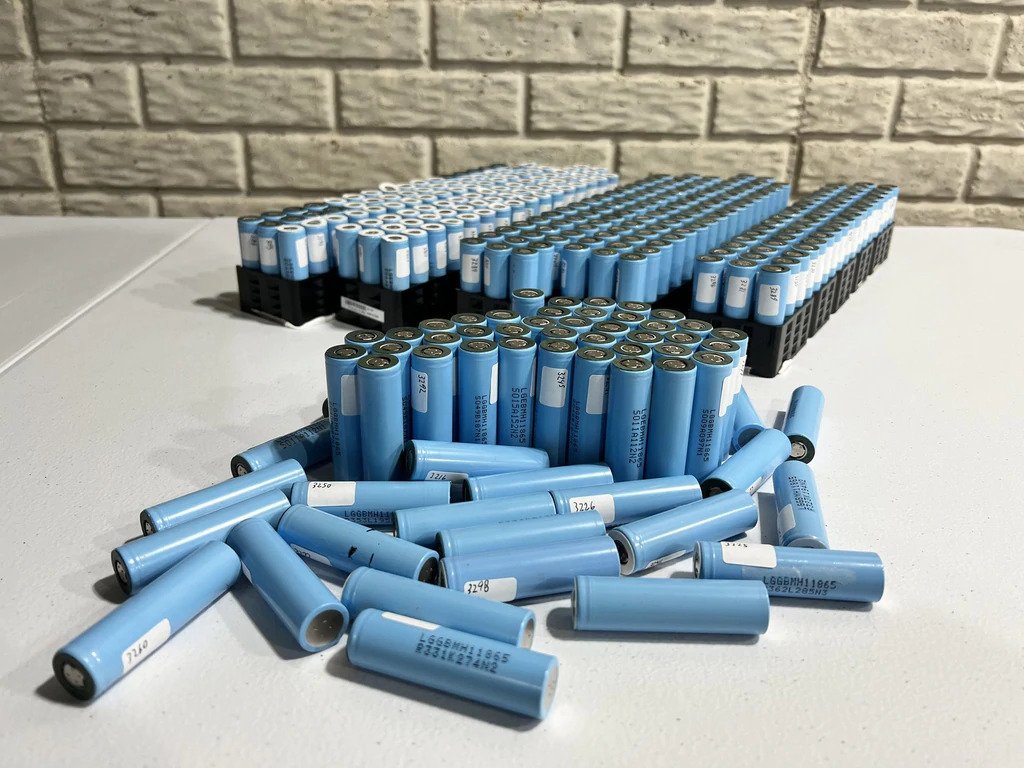
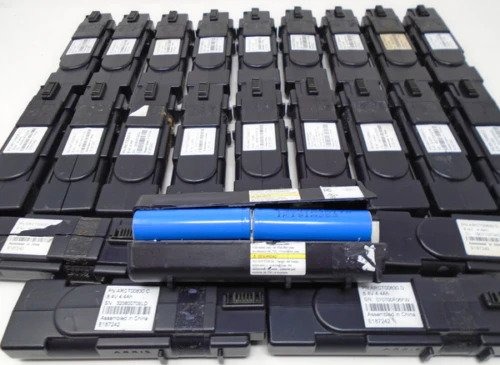
If the laptop battery pack you are tearing down uses cylindrical cells, those are going to be 18650s. Remember, some laptops use lithium polymer pouches, but if a laptop doesn’t, then the cells inside are going to be 18650s. These cells are named for their diameter and length, as they are 18mm wide and 65mm tall. They are a metal cylinder shape, and they aren’t very hard to remove from the battery pack.
NOTE: The newer generation of ultra-thin laptops will not have 18650s or any other kind of cylindrical cell. Those cells are too big for modern, high-end laptops. New laptops use lithium polymer pouches. Laptops generally use a running voltage of about 12 volts. The problem is, lithium-ion cells can only provide a maximum of 4.2 volts. For this reason, you are guaranteed to find some good cells in a laptop battery because not all the cells are going to go bad at once, and it only takes one cell to go bad to shut down the battery pack.
How Many Lithium Ion Cells Are In A Laptop Battery?
Most of the time, laptop manufacturers will use 3 or 6 cells, but they are generally always in a 3S configuration. So, if it's just 3 cells then the battery is in a 3S1P configuration. If it's a 6-cell battery pack, then it's more than likely in a 3S2P configuration.
NOTE: Be careful when you are taking these battery packs apart! The nickel used to make lithium-ion battery packs is very thin. So, when it's cut to a sharp edge, it can easily pierce your skin.
How Many Lithium Ion Cells Are In A Scooter?
Scooter batteries come in all shapes and sizes. In most cases, you will find scooter batteries in a 3P configuration. The number of S groups in a scooter battery range from 10 to 14. So, most scooter battery packs will have 30 to 42 18650 lithium-ion cells. A lot of times packs that come out of e-bikes or e-scooters can be repaired and restored.
How To Disassemble 18650 Battery Packs
The very first step is to open the battery pack. In the case of a laptop, the battery pack is encased in a hard plastic shell. There may be some screws holding it all together, so check for that. After removing any screws, with some effort, you will be able to pry off the plastic casing with a flathead screwdriver.
It's important to be slow and methodical when removing the nickel strip from the cells. It's helpful to grab a small bit of the nickel with a pair of pliers and then pull the nickel off with a twisting motion. Be very careful! Lithium-ion cells can discharge a massive amount of current. So, if you short one or more cells out, it could literally start a fire!
How To Determine If Lithium Ion Cells Are Bad
Phase 1: Visual Inspection
The first step is to give the cells a visual inspection. Do you see any rust? Do you see any liquid? Any signs of dried liquid around the positive terminal? If the answers to any of those questions are 'yes,' then you need to discard those cells.
There is a chance that some of the rusty ones are still good, but for now, we will keep things simple and clean. Rust can happen under some normal circumstances over prolonged use, but if you are seeing any kind of fluid leak or if you can smell a mildly sweet aroma from the batteries, then that is a tell-tale sign that something went seriously wrong with that cell. That sweet smell is actually the smell of the electrolytic that is supposed to be sealed in the battery.
In a way, if you are opening a consumer battery pack for salvage, you kinda want to see one or two cells that are visually damaged. That would provide a plausible explanation for the failure of the pack and also the statistical likelihood that the rest of the cells are good!
Phase 2: Voltage Testing
The next step will require a multimeter. Set it to voltage and the lowest DC range. While voltage alone cannot be used to determine a battery’s SoH (State of Health), a cell’s voltage can certainly be used to determine if the cell is dead or not.
So, put the negative probe on the negative end of the cell and then touch the positive probe to the positive terminal. A good cell will test somewhere between 2.8 and 4.2 volts. While this varies from cell to cell, generally speaking, if the voltage is 2.5 volts or less, the cell is damaged to some degree. Anything around 2 volts or lower is pretty much a dead cell.
An over-discharged cell is still technically useful as it will still hold a charge, but it will provide less energy storage than an equal cell that was not over-discharged and it will not provide anywhere near the consistency. So, for the purposes of this tutorial, we are also going to avoid them.
Once you have a pile of salvaged cells, store them properly: our guide on whether lithium batteries go bad when not used covers safe long-term storage voltage.
Anything lower than 2 volts and the cell is pretty much completely dead and should be discarded.
Phase 3: Charge Testing
Ok, now that we have done our preliminary sorting of cells, we (hopefully) ended up with a few good ones. Now it's time to try and charge them. Just about any lithium-ion cell is safe to charge to 4.2 volts. Any cell should be able to take a charge current of 0.5C. So, if you have a 2200ma cell, you should be able to safely charge that at a rate of 1.1A.
In the case of salvaging 18650s, though, it's a good practice to limit charge current to 500ma (half an Amp). Remember, you don’t know the condition of the cell and can’t really depend on its rating until you do further testing. So for now, we will keep charge currents very low.
To properly charge a lithium-ion battery, you need to use a constant current power supply. Unlike lead acid batteries, which you can charge with a constant voltage, lithium-ion cells have a more sophisticated, 2-phase charging method. If you are using an off-the-shelf battery charger, then you don’t have to worry about that. As long as it's made for lithium-ion, you should be good to go.
Monitor the battery's temperature by placing your hand on it. It should not get very warm at all when charging at only 500mA. If the cell gets exceptionally warm during charging, then chances are it has some level of internal damage.
This can usually be verified by charging the cell and disconnecting it. All you have to do is check the voltage of the cell right when you pull it off the charger, and then check the cell’s voltage again in about a week. If the voltage drops by more than 0.2 volts, then the cell is more than likely bad.
NOTE: If you charge a cell and it feels warm even when nothing is connected to it, that means it has a serious internal short and should be discarded.
Phase 4: How To Check An 18650’s Internal Resistance
Internal resistance is easy to test for. All you need is a load resistor of a known value and a multimeter. You can also skip the math and buy an Internal Resistance Meter.
Here is the formula to calculate 18650’s internal series resistance:
ISR = ((X-Y)*R)/Y
It looks complicated at first glance, but I will break it down for you. X is a cell's open-circuit voltage. An open-circuit voltage is whatever the voltage of a power supply is when there is no load attached. So, to get this voltage, all you have to do is check the cell with a multimeter. Write down this exact voltage. For this example, we will say that it’s exactly 4.2 volts.
ISR = ((4.2-Y)*R)/Y
Y is the cell voltage during the test. The Y voltage will always be lower than the X voltage, and the difference is actually what we need for our equation. The next step is to attach the load resistor to the cell.
NOTE: The load resistor is going to be handling a decent amount of power, so it will get hot relatively quickly.
That's ok though because we really only need to touch the load resistor onto the positive and negative sides of the cell for just long enough to see the difference on the multimeter. Write this number down. This is Y. For the purposes of this example, we will say that the cell dropped to 3.9 volts when under load.
ISR = ((4.2-3.9)*R)/3.9
As you can see, we now have two numbers in the parentheses, so we can do some basic math to further simplify our equation.
ISR = (0.3*R)/3.9
Now we are getting somewhere! Now switch your multimeter to resistance and select the appropriate range. Use the probes to measure the resistance across your load resistor. If you are using a 4 Ohm load resistor, you should get something close to 4 Ohms. The reason I say ‘something close’ is because like all other electronic components, load resistors are made to within a certain tolerance.
So you may end up seeing 3.91 Ohms or 4.16 ohms on your meter. Write this down, this is R. For the sake of this example, however, we will pretend to have a perfect 4.0Ohm load resistor.
ISR = (0.3*4)/3.9
As you can see, we can now multiply the numbers in parentheses.
ISR =1.2/3.9
And of course, now we can do our last division step.
ISR = 0.3076
So, in this example, we end up with 0.3076 ohms which is 308 mOhms. A brand-new 18650 battery in perfect health will have an internal resistance of 80mOhms or less. A worn-out cell, on the other hand, can have a resistance of 200mOhms or higher.
The general rule of thumb, anything over 100mOhms shouldn't be used. Most used cells will fall somewhere between 40 and 300 mOhms, the lower the better!
What Can I Do With Salvaged 18650 Cells?
At this point, you have a lot of perfectly good, totally tested 18650 cells. So, you may be asking yourself, ‘What can I do with all these cells?’ Well, the answer is pretty much anything. If you only have a few, you could build a very low-cost USB power bank. If you have a lot of them, you could build your own e-Scooter or build an e-Bike battery, or even a DIY power wall!
 Need more packs?
Do you need more packs for your current project? Check out Battery Hookup's selection of packs and cells. You're sure to find exactly what you need for your next project. Use code CS5 for 5% off at checkout!
Check out packs
Conclusion
Discarded, perfectly usable lithium-ion cells are all around us! Salvaging 18650 cells is a form of recycling and recycling is always a good thing. It’s good for the environment and it also saves you money, so it's a win/win!
That's why it's useful to know how to salvage, sort, and test 18650 cells! As it turns out, it's not that hard. All you need are some basic hand tools, a battery charger, and a multimeter. More advanced testing can be done with a load resistor. This article has all the information regarding the tools and procedures to get you started salvaging 18650 cells. Additionally, for those interested in maximizing the lifespan of lithium-ion cells, we have an article on how to get more cycles out of them that you can read.
As you can see, there is quite a bit to the process, a quick rundown of the process remove the cells from their packs, clean off the nickel strip, weed out the bad ones based on their visual condition and voltage, and testing and sorting the cells based on capacity and internal resistance. Thats it!!
Turn the guide into a real build plan
If this article is part of an actual battery, powerwall, or pack-design project, the next step is usually moving from theory into the calculators and planning tools.
Battery Storage
If this article sent you down a deeper rabbit hole, the topic page collects the rest of our guides, explainers, and project notes in this category.
Browse Battery Storage