How to Test Lithium-Ion Cells Battery Health Testing Process
Posted March 30, 2022 • Updated July 10, 2026
You are here: Home / Blog / Battery Storage / How to Test Lithium-Ion Cells Battery Health Testing Process
Table of Contents
If you want to know how to test 18650 cells, you are in the right place. Testing cells is one of the most important steps in preparing salvaged 18650 cells for reuse.
A Quick Overview of The Lithium Health Testing Process
If you want a quick overview of what the process looks like, these 7 steps are on how to test and grade cells. If you are looking for a more in-depth overview of what each step looks like, visit the bottom of the article.
Step 1: Salvaging - To begin the process of salvaging lithium-ion cells, the battery pack must first be removed from its original casing. This is typically done by using tools like pliers or wire cutters to carefully take apart the battery pack and remove the cells. Once the cells are removed, they can then be visually inspected to determine their condition.
Step 2: Visual Inspection - After the cells have been removed from the battery pack, they undergo a visual inspection to ensure they are not physically damaged and show no signs of leaks. This step is crucial in ensuring that the cells are safe to use. Any cells that show signs of damage, such as cracks, dents, or leaks, should be discarded immediately. Not all marks and discolorations are signs of damage, as you may be able to just clean them off.
Step 3: Cleaning - The next step in the process is to clean the cells of any glue, paper, or tape that was used to hold the battery pack together. This will reduce any added contact resistance and prevent any contamination from affecting the performance of the cells. The cleaning process can be done using a solvent or a specialized cleaning solution, depending on the type of residue present. A metal scrub brush is also extremely helpful. After you clean the cells, it's time to charge them.
Step 4: Charging - After the cells have been cleaned, bring them to a full charge while monitoring their temperatures. This step is crucial in determining the health of the cells and ensuring that they are capable of holding a charge. If any cells become abnormally warm during charging or do not hold their charge, they should be discarded. This can indicate that the cell is damaged or has a manufacturing defect, and it is not safe to use. Now that the cell is fully charged, you can see if it has any self-discharge.
Step 5: Self-Discharge Test - Leave the charged cells sitting for a week or so. This will allow you to see if the cells are still capable of holding a charge over time. Any cells that show a voltage drop above .1v after one week of storage should be discarded. Once you have determined that your cells don’t have any problems with self-discharge, you will be able to test them for capacity.
Step 6: Capacity Testing - The next step in the process is to capacity test the cells and label them to ensure that they can store the correct amount of energy. This step is crucial in determining the usefulness of the cells, as cells that fall below 90% of the original manufacturer capacity may not be capable of providing enough energy to be used in a practical application. We put together a list of the best capacity testers after trying them all. Once you have done all of that, the final step is to check the cell’s resistance.
Step 7: IR Testing - ISR (Internal Series Resistance) is the number 1 indicator of a battery cell’s SoH (State of Health). This step helps to determine the deviation from the manufacturer's specifications in the most important regard. Cells that fall too far outside of the manufacturer's spec should be discarded as they will generate too much heat.
Testing 18650 Cells Health Detailed Steps
The process of testing 18650 cells properly can be quite involved. There are several key factors to consider and processes to understand in order to properly salvage, test, and sort 18650 cells.
How to Determine Cell Health
Look at it! A simple visual inspection is often all it takes to weed out the worst of the cells. Look for common signs of degradation like dents, swelling (which is rare for cylindrical cells), or signs of dried liquids.
Check the voltage. A good cell will have a voltage between 2.6 and 4.2 volts.
Do a load test. A load test is very close to a real-world test. It can show you if a cell is bad by exhibiting a particular level of voltage drop under a given load. If you are not sure how much a cell’s voltage should drop for a given load, simply check several cells. If there are any bad ones, they will have a larger voltage drop than the others and it's unlikely that they will all be bad. For a basic, 2ohm load, the voltage of a cell should only drop by around .1 to .3v depending on the state of charge.
Check the cell’s capacity. The rated capacity will always always be listed directly on the cell. If it’s not, you can generally look up the model number and find that information in the datasheet. Compare that number to what a cell capacity tester says to make sure your cells are within spec. If you don’t get exactly what the cell claims, don’t be alarmed. As long as the figures are within 10% of the target, the cell is more than likely good. A cell with a significantly lower-than-rated capacity will no doubt have a high internal resistance.
Test the resistance. Resistance is the most indicative factor of a battery cell’s SoH (State of Health). A good cell will have a relatively low resistance of about 30 to 50 mOhms.
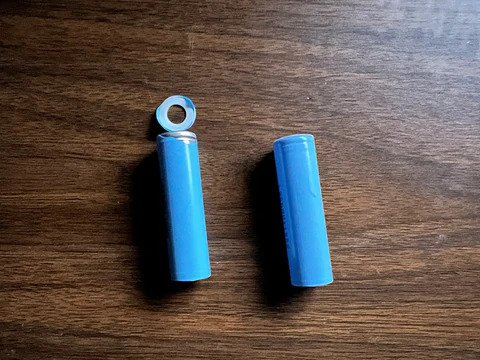
Visual Inspection
After that, the next step is to inspect the cell for any visible signs of damage. A small scratch on a cell’s wrapping is not a major cause for concern, but if a cell is swollen, leaking, or discolored, it is discarded. If a cell has leaked, it can have a somewhat sweet smell to it.
How To Check If 18650 Battery Is Bad
Evidence of visual damage like swelling, dents, or signs of dried or still fluidic liquids: If the battery shows any signs of physical damage or leaks, it is likely that the battery is damaged and should not be used. A swollen battery cell is dangerous because the swelling is the result of heat and gas that have built up within the cell. If enough heat and gas build up in the cell, it will vent with flame or could even explode.
If you notice a sweet smell: Any kind of hole in a cell is a very bad thing. Holes can come from physical impact as well as internal damage. For whatever reason, the electrolytic that is used to separate the negative and positive sides of lithium-ion batteries. So, if you smell an odd, slightly sweet smell, the cell’s electrolyte is or has leaked somewhere and should be properly discarded.
If a cell has a voltage below 2.6 volts or higher than 4.2 volts then it means the battery cell has been through some level of drama. Any battery that spends any amount of time outside this range is going to have problems. NOTE: If a cell’s voltage is higher than 4.2, it’s dangerous. Get rid of it.
If you do a load test and it produces a serious voltage drop or a voltage drop that drastically varies between tests: If the battery voltage drops significantly under load or the voltage drop varies greatly between tests, it could indicate that the battery is weak or has a high internal resistance.
The cell’s capacity is below 10% of the rated capacity: If the battery capacity falls below 10% of its rated capacity, it’s a strong sign of a bad battery that won’t last as long as the others and will run hot.
The cell resistance is significantly above 50 mOhms: If the battery resistance is significantly higher than 50 mOhms, then it pretty much means the battery is bad and won’t be performing as it should.
How To Check If 18650 Battery Is Good
No sign of visual damage such as dents, swelling, or signs of dried liquids: If the battery looks undamaged and there are no signs of leaks, it is likely that the battery is still in good condition and can be used safely.
A voltage between 2.6 and 4.2 volts: If the battery voltage falls within the 2.6 volts to 4.2 volts range, it's generally a good sign that the cell has not been through certain types of trauma.
A load test that does not produce a significant or inconsistent voltage drop: If the battery voltage remains stable during a load test, then it typically means that the cell is doing ok and can perform as expected.
The cell’s capacity is within 10% of the rated capacity: If the battery capacity is within 10% of its rated capacity, it means it was not overly used for many, many cycles. This generally means a given cell has a few more years of life left in it.
The cell resistance is within 30 to 50 mOhms: If the battery resistance falls within the 30-50 mOhms range, it can be a sign that the battery is still in good condition and can perform well.
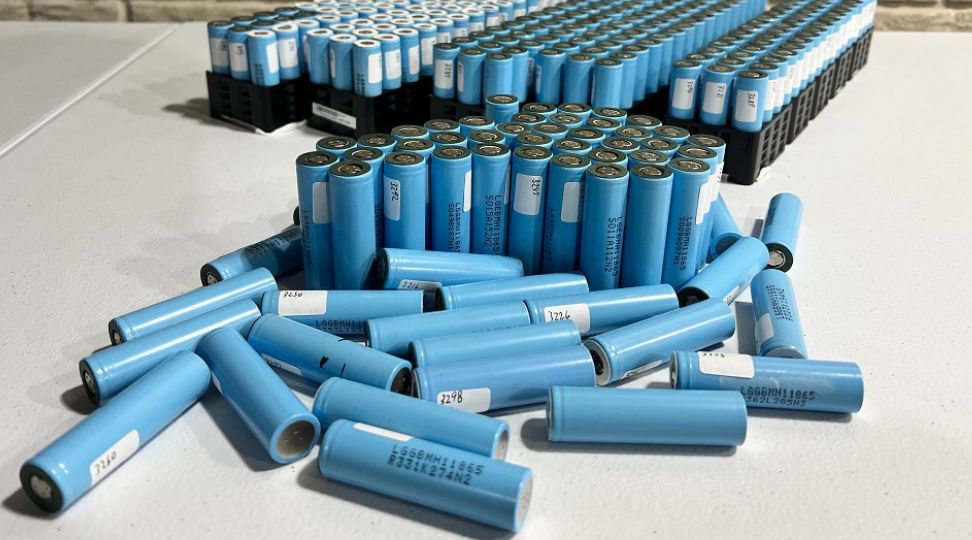
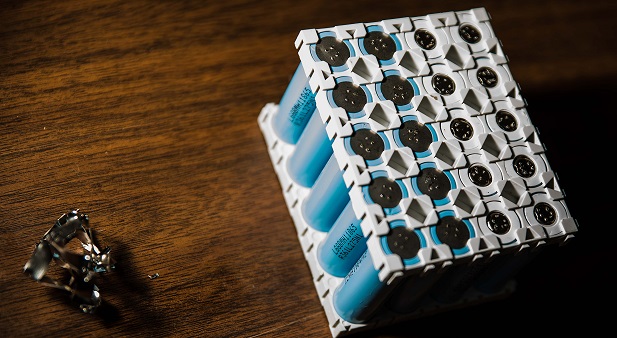
Salvaging the Cells
When mass-producing lithium-ion battery packs, a significant amount of adhesives and permanent fasteners are used. This can, at times, make the salvaging of cells difficult.
That’s why our first step is to remove the battery packs from whatever device or housing they were installed in. After that, we break down the battery packs and separate the cells.
All over the place. Our modern world is literally powered by them. You can find 18650 cells in things like discarded scooter batteries, modem battery packs, and old laptop battery packs.
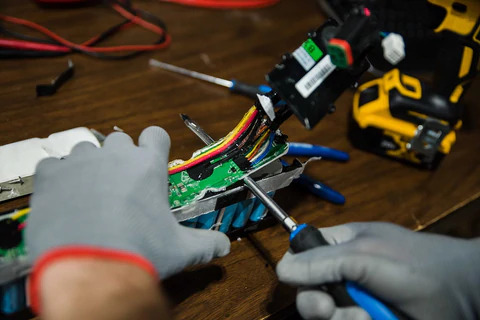
How Do You Break Down A Battery Pack?
The first step is to remove the battery pack's exterior casing. After that, you may have to pry or otherwise work loose the battery pack from the casing. Then, the nickel strip needs to be carefully removed from the cells.
Once that is done, you can generally break loose any adhesives or hot glue that is used to hold the cells together. Once you have the cells freed, the final step is cleaning any remaining debris off of the cells. Check out our in-depth overview on how to break down battery packs for their lithium-ion cells.
Visual Inspection
After that, the next step is to inspect the cell for any visible signs of damage. A small scratch on a cell’s wrapping is not a major cause for concern, but if a cell is swollen, leaking, or discolored, it is discarded. If a cell has leaked, it can have a somewhat sweet smell to it.
As mentioned before, lithium-ion battery packs are generally put together as a permanent, non-serviceable structure. Before we begin electrically testing any 18650 cells, do your best to remove all the nickel, glue, and tape off of each and every cell.
If you find that the tape, hot glue, and other adhesives used to hold cells together are too difficult to remove, then try using a heat gun. How well any adhesive works is a function of its temperature. So, applying a little heat is usually enough to loosen the bond.
Heat is bad for batteries, so make sure to not heat up the cells for too long. It does not take much surface heat to loosen adhesives and glues.
When removing the nickel strip from 18650 cells, it's best to grab the nickel by an edge and slowly roll the nickel strip off of the cells. The rolling action requires the least amount of force to remove the welded nickel, but make sure to not short out the cell when doing this!
Charging
Once we have clean, visually inspected cells, the next step is to charge test the 18650 cells. As they are charging, cells are monitored for heat buildup. If any cells exhibit unusually warm charging characteristics, they are discarded.
What Is The Ideal 18650 Temperature Range
How Can You Tell If An 18650 Is Getting Too Hot?
There are several devices on the market that can precisely monitor 18650 cells during their charging and/or discharging phases. While these devices are useful, they can be somewhat expensive. Another option would be to use an infrared thermometer along with a standard battery charger. You would be surprised, however, by how much insight you can gain about a cell's temperature characteristic with something as simple as the palm of your hand. So, as you are charging your battery cell, keep tabs on their heat output with the palm of your hand. If a battery cell is getting warm under very small charge currents, then the cell more than likely has an internal problem.
Why Is It Bad For 18650 Cells To Get Hot?
Unless you are putting them under tremendous charge or discharge loads, you should not feel too much heat from your battery cells. If you do, that means the cell either has an extremely high ISR (Internal Series Resistance) or it has some amount of internal discharge. Internal discharge is when the positive and negative electrodes are physically touching inside the cell.
Self Discharge Test
If a lithium-ion cell is worn out or damaged, it will have some degree of self-discharge. Self-discharge happens because the positive and negative electrodes, to a very small degree, are physically touching inside the cell. As you may expect, this is a bad thing.
So, that’s why when we are testing 18650 cells, we let the cells sit for a full week once they are fully charged. If the voltage of any cell drops by more than 0.1v during that time, the cells should be discarded.
Why Do Bad Batteries Drop Voltage Over Time?
Internal discharge. When a cell is worn out, the electrodes will literally grow towards each other very slowly. While there is a mechanism inside the cell to keep them from touching, it will eventually happen. When it does, it causes the cell to discharge into itself slowly at first, but increasingly so over time.
Yes, but to a very small degree. There are several factors at play that cause a battery's voltage to drop over time. All cells exhibit some form of self-discharge, but for healthy cells, this phenomenon happens rather slowly. Expect a good cell's voltage to drop somewhere between 0.5% to 2% per month.
Capacity Testing 18650 Cells
As you can see, there are a lot of reasons to discard cells. The cells that have made it this far are then put on a capacity tester to determine how much actual capacity the cell has. If any of them read abnormally low, you guessed it, you should discard those cells.
Why Is Capacity Testing Important?
Capacity testing is important because of how Battery Management Systems work. If you don't match the amount of capacity in each cell group, one will reach a full charge or be depleted sooner than all the others. To keep things safe, the BMS will shut off the battery if any single cell group hits the over-discharge or over-charge threshold.
We designed our battery repacker tool to make this part of building a lithium-ion battery pack much easier. Once you enter all your cell capacities in the tool, it tells you the most optimal way of packing the cells together. This helps ensure the longest running time and lifespan for your battery.
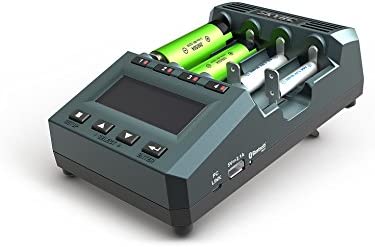
Here is a list of chargers that we have used, from best to good.
SkyRC MC3000
The BEST tester & charger on our list. Charges any cylindrical cell up to 3A. 50W charging power. Discharges at up to 2A. Supports all chemistries.
Another great option. 4 bay charger & tester. Fits a wide range of cylindrical cells. Utilizes a multi-charge option where you can set charge currents for each bay independently.
A good option for those that want to charge and test a large quantity of cells. This is an 8 bay charger & tester. Works with a large variety of cylindrical cells.
When learning how to test 18650 cells, IR (Internal Series Resistance), is one of its most important characteristics. The lower the resistance, the less voltage drop the cell will experience under load. This leads to less heat build-up, which provides for a longer total cell life and, therefore, a longer battery pack life.
For these reasons, each remaining cell is tested for IR and its figures are compared to the manufacturer’s spec sheet. If any cell deviates too much from what the manufacturer states, that cell should be discarded.
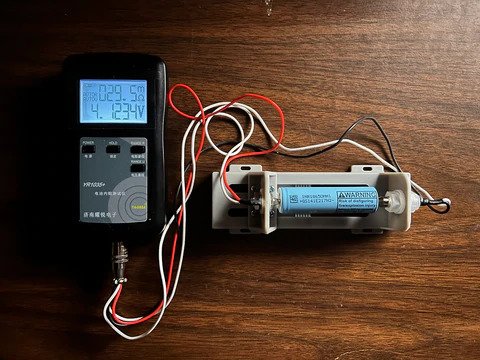
YR1035+
The better of the two options when it comes to testing IR. Digital LCD screen. Super accurate tester.
vWhy Is It Important For All The Cells To Have The Same IR?
The cell’s ISR governs how hot the cell will get and how much of a voltage drop it exhibits under a given load. So, if one of your P groups has a cell with a much higher IR than the other cells, it will experience more voltage drop than the other cells.
This causes energy to flow from the good cells into the bad ones, which only exacerbates the issue. And remember, as a cell’s temperature increases, so does its resistance. This creates a potentially hazardous positive feedback loop that will make your battery pack fail a whole lot sooner than it otherwise would have.
Also, if a parallel group has a cell with a very high IR, that will cause the BMS to shut the battery pack down far before the other parallel groups are totally depleted.
Conclusion
When it comes to working with 18650 cells, learning the process of inspecting cells for visual damage, testing cells for voltage drop, and performing a proper charge and discharge test for each and every cell is crucial.
Remember, if a lithium-ion battery pack is built with unmatched cells that have many different capacities and internal resistances, the end result could be unsatisfactory or even dangerous.
We hope this article helped you learn how to test 18650 cells yourself.
Turn the guide into a real build plan
If this article is part of an actual battery, powerwall, or pack-design project, the next step is usually moving from theory into the calculators and planning tools.
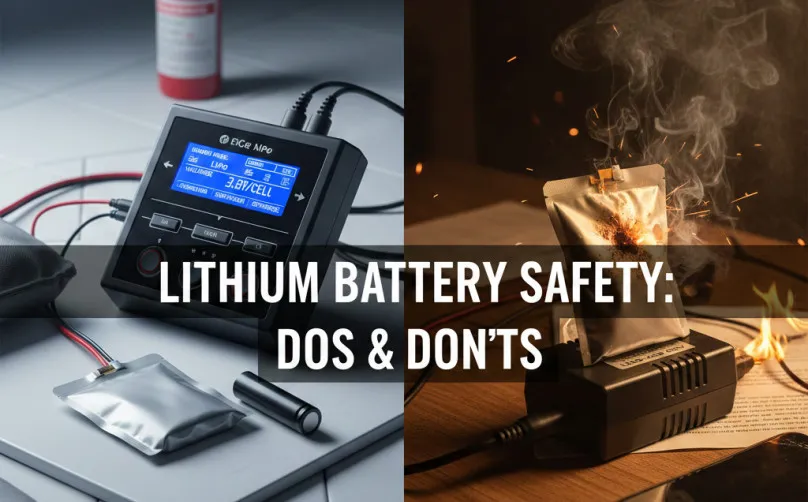
Charging a lithium battery with the wrong charger can lead to fire or explosion. This guide covers the essential "Do's and Don'ts" of lithium-ion and LiPo batteries, explaining the role of a BMS, the 80% rule for longevity, and safe storage practices to keep your home and devices protected.
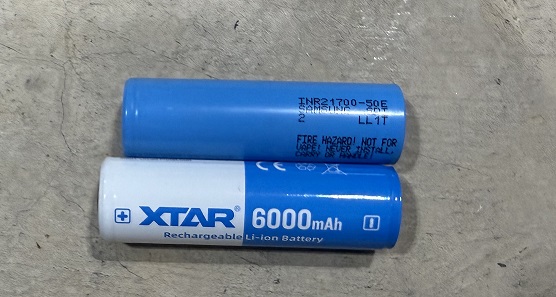
Looking to find the highest capacity 21700 cells on the market, that's not always the top consideration also the market is filled with tons of cells. We put together this article to help guide you to legit high-capacity 21700 cells and what to watch out for to avoid buying a fake cell.
Heat is a major factor in reducing lithium battery life. Learn how exposure to sunlight, high currents, and low voltages can damage batteries, and discover effective strategies to enhance their lifespan.


 SkyRC MC3000
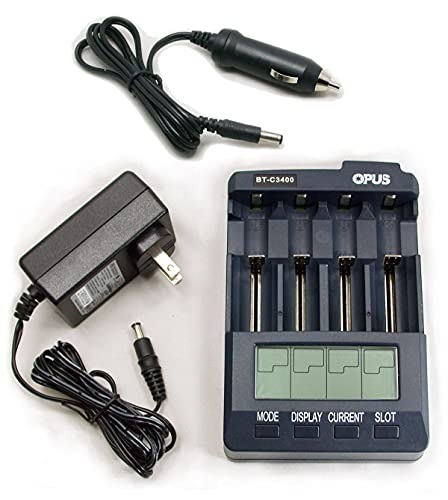 Opus C3400
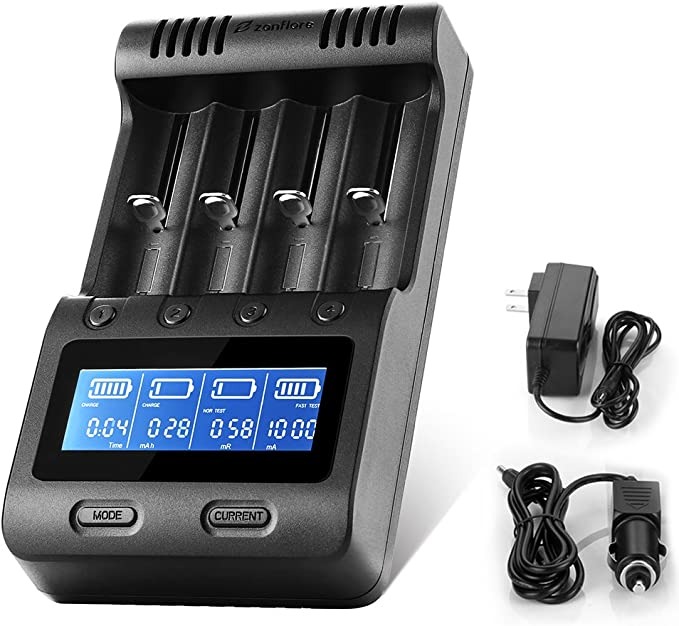 Zanflare Charger & Tester
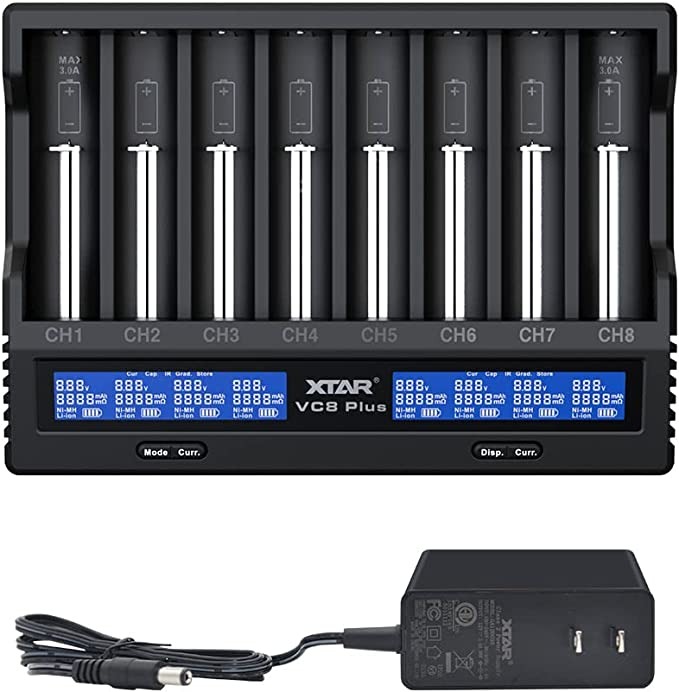 XTar VC8 Plus
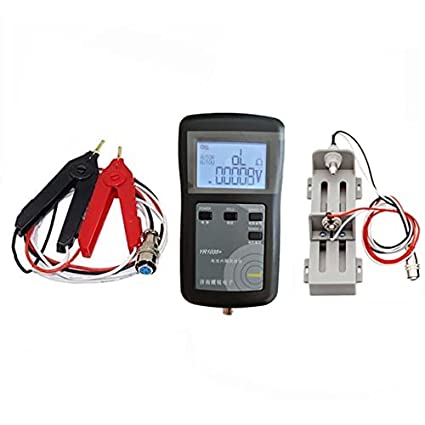 YR1035+
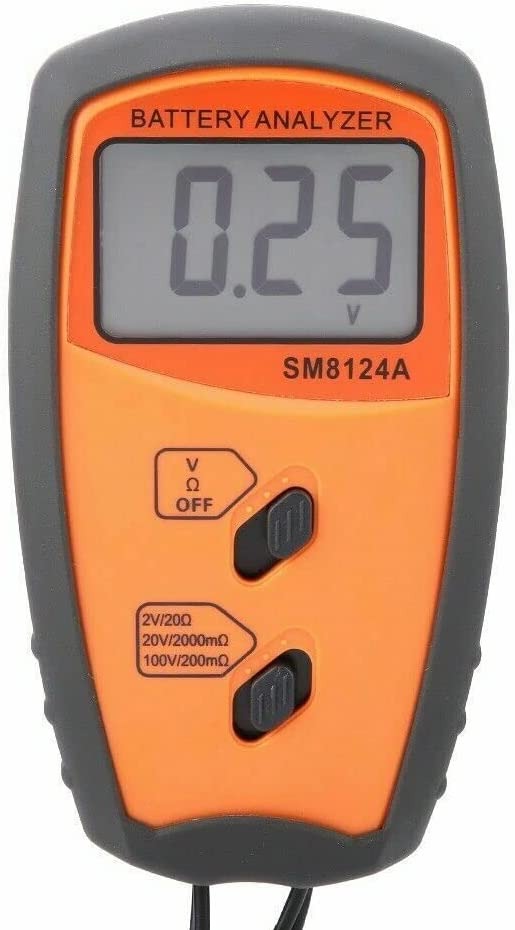 SM8124A