Table of Contents
Have you been wondering how to build an ebike battery? The battery is generally the most expensive component of an ebike, so building one yourself saves you hundreds of dollars. Building an ebike battery is not a simple process, but it's not rocket science either.
To build an ebike battery, the first step is to find out how many cells are required in series to provide the voltage you need to run your ebike. The next step is to find out how many cells are needed in parallel to safely run your ebike and provide a high range. Then, you need to confirm that all cells are at the same voltage before spot-welding them together. After that, the BMS, charge, and discharge connectors are added. Once that is complete, the connections need to be taped up and the battery needs to be wrapped in PVC heat shrink. That’s all it takes to build an ebike battery.
In this article, we will explain all the tools and proper procedures needed to build an ebike battery. We will also walk you through the entire process of designing and building an ebike battery from scratch.
How Does An Ebike Battery Compare To A Car?
I’d like to start this article with an analogy. An e-bike is to a car as a smartphone is to a PC. While there are still some tasks that require a full-fledged PC to accomplish, a surprising amount of work and productivity can be achieved with today’s smartphones.
The power of a smartphone can be traced back to major advancements that were made in microprocessor and power management technologies. I’m drawing this comparison to smartphones because we are starting to see a similar situation play out in the transportation sector.
Lithium-ion battery cells cost 10 times less than they did 10 years ago. This fact, along with recent advancements in semiconductor-based power control electronics has made today’s ebikes capable of the type of performance that can replace a car for most day-to-day transportation needs.
Unless you need to go very far distances, have to carry large amounts of cargo, or have to travel in severe weather, there is almost no practical reason to use a car over an ebike.
Components Of An Ebike
Ebike setups can get rather complicated, and there can be many parts, accessories, and settings involved. When it comes down to it, though, the most important aspects of an ebike are the battery, controller, and motor.
Battery
On the surface it may seem like an ebike battery is the electrical equivalent of a fuel tank in an automobile. While it is true that like a fuel tank, an ebike battery stores energy that is used to move the vehicle, but it's a little more complicated than that.
Unlike a fuel tank, an ebike battery has a voltage. If it's a high-voltage battery, it will be able to deliver more power compared to a lower-voltage battery with all else being equal. So, an ebike battery not only stores the energy to be used by the motor but also can determine how much energy can be delivered to the motor through the controller.
Controller
An eBike controller is a device that connects between your battery and your motor. The controller has a throttle input and it sends power from your battery to the motor when you engage that input.
Motor
An ebike motor is the magic component that converts electrical power into mechanical motion. Whether it's a chain-driven mid-drive motor, where power is transferred to your bike's chain, or a hub motor that directly spins the rear wheel, the motor is the end of the line for the power coming from the battery.
So, Why Are Ebike Batteries So Expensive?
Ebike batteries are expensive because when you are buying a battery from someone else, you are not only paying for the parts but you are also paying for their labor. It takes a lot of time and effort to build an ebike battery. Not only that, but the process itself can be somewhat hazardous.
Because of this, if anyone is building an ebike battery for you, they are also going to charge a certain amount for their time and effort. So, why not just cut out the middleman and build your own battery pack? Building your own ebike battery will save you money while also providing you with vital experience for a new, in-demand skill.
In this guide, we will walk you through the entire ebike battery-building process. Using the information in this article, you will be able to determine if it's best for you to build your own ebike battery or to have a professional do it for you.
How To Build An Ebike Battery
Below is a list of absolutely everything you need to put an ebike battery together. Below the list of tools and supplies, we provide detailed instructions on how to build an ebike battery.
Lithium-Ion Cells
The very first thing you are going to need are some lithium-ion cells. When building an ebike battery, it's important to make sure that all of your cells are the same.
For the purposes of this guide, we will be using BAK N18650CK cells which are 3050mAh and can support a continuous discharge current of 6.1 amps. Later in this guide, we will discuss how to use the cell’s specifications to determine how many of them are needed in series and parallel to build an ebike battery.
BMS
The BMS is the heart of an ebike battery pack. The BMS is what determines if an ebike battery is in a safe enough state to be charged or discharged. Also, the BMS is the device that is responsible for keeping an ebike battery’s cells as balanced as possible.
When building an ebike battery, it's important to make sure that the current rating of the BMS either matches or exceeds the maximum current rating of your ebike controller. If the BMS cannot support the maximum current of the controller, the BMS will cut off under heavy loads and can leave you stranded with no choice but to push your bike back home.
Guided BMS Picker Need help picking a BMS that has balancing built in, use the tool found at the link below to get guided to the correct BMS. BMS Picker
Charge And Discharge Connectors
When building an ebike battery, make sure to give your battery the connections that your e bike already has. For example, if your ebike controller uses an XT60 male connector for its power input, then you need to put a female XT60 connector on the ebike battery you are building.
If you use the same charge-discharge connectors that are already on your bike, then your new ebike battery will be a dop-in plug-and-play replacement. There are many different battery connector types, so make sure you are using ones that are rated to handle the load of your controller and motor.
Tools Needed To Build An Ebike Battery
Multimeter
A multimeter is a basic electronic tool that can be used to measure voltage, current, and resistance. When building an ebike battery, the most important use for a multimeter is to verify your cell voltages before welding them together. A multimeter is also the safest way to verify that your BMS is on and functioning.
Soldering Iron
Even though the main connections are made with a spot welder, a soldering iron is still a critical tool when it comes to building an ebike battery pack. Not only will the BMS sense wires need to be soldered to strategic points on your nickel strip, but you will also have to solder your main battery connections to the BMS and charge and discharge connectors.
Spot Welder
When building an ebike battery, it’s important to use a high-quality spot welder. If you use one of the $50 to $80 models on Ebay or Amazon, then you will not be able to weld with a nickel strip much thicker than 0.1 millimeters or may have inconsistent welds.
Standard, high-current ebike batteries use nickel strips that have a thickness of about 0.15 millimeters. The additional 0.05 millimeters of thickness may not sound like much, but it allows for around 50 percent more current carrying capacity compared to thinner 0.10-millimeter nickel strips.
Considering that fact, the best welder to use when building an ebike battery is going to be the one and only Kweld. A Kweld has more than enough power to weld nickel strips up to 0.20 millimeters thick. So, that means that a Kweld will have no problem welding standard 0.15-millimeter nickel strips.
Essential Tools & Supplies All tools and supplies needed for this project can be found at the link below BMS Picker
Other Supplies Needed To Build An Ebike Battery
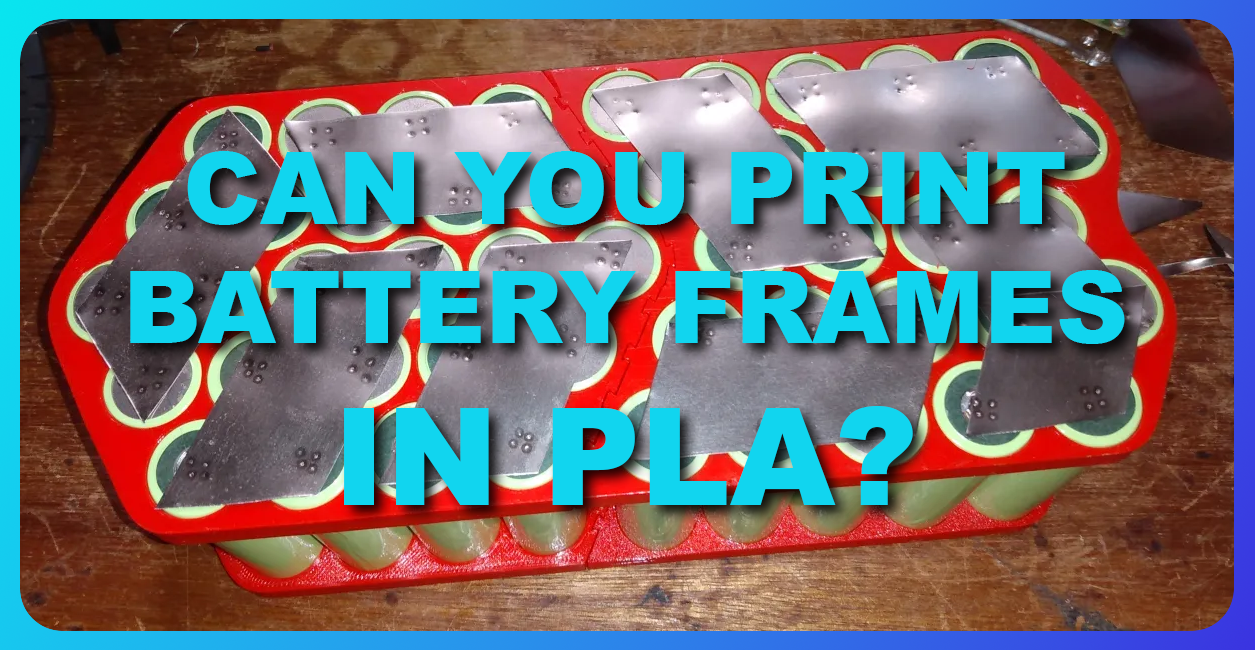
Cell Holders
It's important to use cell holders when building an ebike battery. Cell holders prevent cells in an ebike battery from making direct contact with one another. While it may be tempting to avoid using cell holders to build the most compact battery possible, it's just not worth the risks.
The tiny amount of size reduction that is achieved by not using cell holders is nothing compared to the risks of having all of the cells in an ebike battery touching each other. If all the cells are touching and one of them fails, it's much more likely for that failure to cause a cascading reaction that spreads to all other cells and causes a massive lithium-ion battery fire.
Nickel Strip
When building an ebike battery, it's important to make sure that the nickel strip you use is 100% nickel and not just nickel-plated steel. It’s also important to make sure it's no thinner than 0.15 millimeters.
0.15-millimeter pure nickel strips are able to carry about 7 amps for every millimeter of width. So, 7mm wide offset double-sided 0.15mm nickel strips are able to carry about 7 amps per connection.
Insulated Copper Wire
Even though building an ebike battery primarily involves welding nickel to battery cells, you will still have to solder several wires to complete the battery pack. When it comes to building an ebike battery, the best wire to use is 10 AWG to 14 AWG stranded silicon-insulated copper wire.
Tapes and Papers
When building an ebike battery, you are going to need both strapping tape and kapton tape. Kapton tape is required to secure electrical connections and provide great electrical insulation. Strapping tape, on the other hand, is used to provide structural strength to the battery.
Heat Shrink For Wires
Any time you have to join wires together inside an ebike battery pack, you will need to provide the junction with an extra layer of insulation in the form of heat shrink. Heatshrink is much thicker and much more reliable than electrical tape. If you want your connections to be secure and look professional, then the solution is heat shrink.
Heat Shrink Tube For The Ebike Battery
Once your ebike battery is complete, you are going to need to give it a final covering to protect it from the elements. Large-diameter PVC heat shrink tubing is perfect for this final step. The small heat shrink tubes for wires can be activated with a lighter, but a heat gun is required when it comes to the large heat shrink tubing used to wrap an entire ebike battery.
Steps to Building a DIY Ebike Battery
STEP 1: Determine The Series Configuration Of Your Battery Pack
After you choose which cells you are going to use, the very first step is to determine how many of those cells need to be put in series to achieve the voltage that you want. Earlier in this guide, we chose BAK N18650CK cells for this example.
BAK N18650CK’s have a nominal cell voltage of 3.7 volts, a capacity of about 3 amp hours, and a constant discharge rating of about 6 amps per cell. When cells are added in series, the voltages add up but the amp hours stay the same.
While it's by no means a standard voltage, most ebikes will work happily around the 48-volt mark. Lithium-ion cells are 3.7 volts nominal. To find out how many cells you need to put in series, you can use this formula:
[Desired Voltage] ÷ [Nominal Cell Voltage] = [Series Cells Needed]
48 ÷ 3.7 = 12.97
(Round to nearest whole number)
So, if you want to achieve 48 volts, you will need to put 13 of them in series (connected negative to positive). It’s important to keep in mind that the voltage of a 13S battery will not always be 48 volts. In fact, it will rarely be 48 volts. Each lithium-ion cell has a fully charged voltage of 4.2 volts and a dead voltage of about 2.6 volts.
So, if you have 13 cells in series, the dead voltage of the pack will be about 34 volts and the fully charged voltage will be 54.6 volts.
While 14 single N18650CK cells in series will indeed create the voltage required to run an ebike, there are two problems. Remember, N18650CK cells can only support 6 amps of current per cell. Most e bikes require at least 25 amps of current, so a 14-cell ebike battery would become overloaded and more than likely catch on fire!
The other problem is one of capacity. The easiest way to understand capacity is in watt-hours. To determine the watt hours of a battery pack, use this formula:
[voltage] x [amp hours] = [watt hours]
It's important to remember that when adding cells in series, the amp hours do not change but the voltages are added.
N18650CK cells are only good for about 3Ah. So, if you have just 14 Cells in series, the resulting battery pack would be just 48V and 3Ah. That is a total of just 144-watt hours. Most ebike batteries are 200 to 500 watt-hours.
STEP 2: Determine The Parallel Configuration Of Your Battery Pack
Now that you know how many series cells your ebike battery is going to need, the next step is to find out how many parallel cells are required to make it reliable and perform how you want it to.
The number of parallel cells determines an ebike battery capacity and maximum current draw. The current draw is the first thing to consider, as it is an element of safety. If you draw more current than your cells like, it will cause excess heat which is never a good thing.
To make sure your ebike battery stays as cool as possible, it's important to make sure that the peak current load never exceeds the sustained maximum current of your battery cells.
The current a battery pack delivers is shared among the cells in each P group. The formula for finding the number of cells required in each P group is simple:
[Sustained Controller Current] ÷ [Cell Sustained Current] = [Number of required cells in parallel]
The same thing can be done for peak currents:
[Peak Controller Current] ÷ [Cell Peak Current] = [Number of required cells in parallel]
So, which one is best? It can be hard to decide, and sometimes it is rather complicated. For the best performance and longest life, it's best to not stress your cells, anyway. So, to get the most out of your battery pack, do this:
[Peak Controller Current] ÷ [Cell Sustained Current] = [Number of required cells in parallel]
So, if you have an ebike controller that has a peak current rating of 25 amps, and you are using cells that support a maximum sustained current of 6 amps, you will need to put 5 cells in parallel.
STEP 3: Confirm That All Cells Are At The Same Voltage
Before connecting ANY cells together in either parallel or series, it's crucial to make sure that they are at the same exact voltage. When connecting cells together in series, it's only important to make sure they have the same voltage so you can get the most out of your battery pack. If series groups are connected together not having the same voltage this will cause an imbalance in the battery pack. The BMS will have to work harder to correct this.
When connecting cells together in parallel, however, if the cells are not at the same voltage, energy will transfer from the higher voltage cell to the lower voltage cells. If this difference is small (less than 0.1 volts), it's no concern and the cells will automatically balance out.
If the cell voltages are any more different than that, however, a large amount of power will transfer from one cell to another. This will cause some amount of damage to the cells in question and can result in a fire if the voltages are too far apart.
So, make sure to charge all of your cells to the same level before building your ebike battery.
STEP 4: Layout And Connections
So, now that you know how many cells you need in both serial and parallel, you can get an idea of what kind of limitations you will have in terms of your battery pack’s shape. To make a 13S5P battery, 65 cells need to be connected together.
The battery pack will be made up of 13 sets of cells. Each set will have 5 cells. In each set, all of the + connections need to be connected together into one common + connection. The same thing needs to be done to the - connection so that all 5 cells in the set share a single + and - connection. This is a 1S5P cell group. The 13 1S5P cell groups can then be connected together in series to form a 13S5P battery pack.
There are several different ways to lay out the cells to make a 13S5P battery pack. The most important thing is for whatever layout you use to confirm with the above described electrical connections.
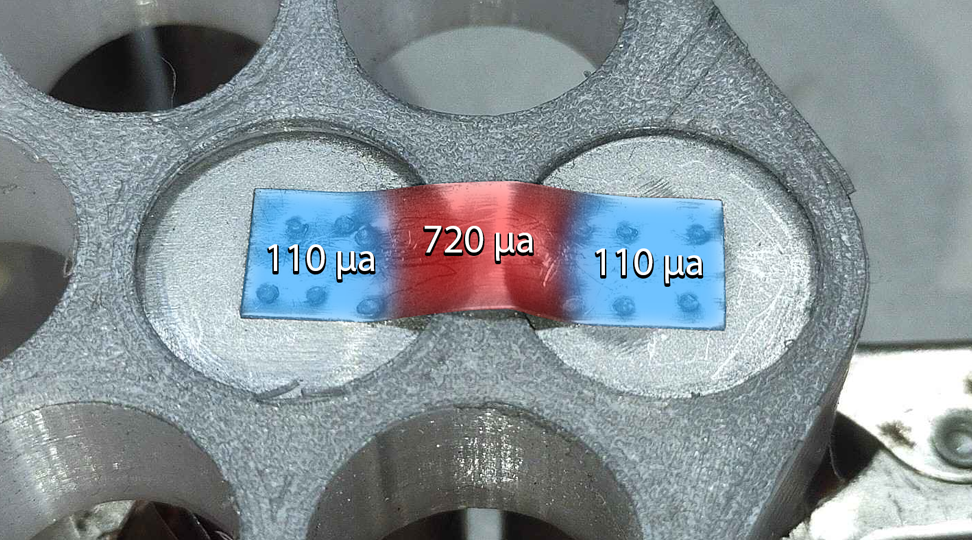
STEP 5: Spot Weld The Cells Together
Spot welding the battery pack is the most important part when it comes to building an ebike battery. Spot welding is resistance based, so if you press too hard you will get too low of resistance and will be unable to make a good weld.
If you don't press hard enough, however, you will have way too much resistance and burn your nickel instead of welding it.
It's a good idea to do some practice welding on some cells that won't be included in your ebike battery. I have found that 26 jules is the perfect amount of power for welding 0.15mm nickel strips with a Kweld.
When making your welds, it's important to perform at least 2 welds per cell. While the act of welding is a low-heat process compared to soldering cells, heat is still generated. For this reason, it's best to do one weld per cell all the way down the battery pack. After that, go back and do a second weld on each cell.
Doing it this way gives each cell plenty of time to cool off between welds. This will result in a slightly higher battery pack capacity because the cells will be less damaged by the welding heat.
STEP 6: Connect The BMS And Connectors To The Ebike Battery Pack
Now that you have all of your cells welded together into one solid electrical structure, all cell groups other than the cell groups at the end should be connected to another cell group.
The unconnected cell group on the positive end is going to be your main battery-positive connection. You can route wires from this connection directly to the positive end of your charge and discharge connectors.
The unconnected cell group on the negative end, however, has to go through your BMS. Connect a large blue or black wire from your main battery negative connection to the B- connection on your BMS. Now, connect the same black size wire to the P- connection on your BMS.
Next wire the BMS sense wires, which are also known as balance leads. These are low-current wires that connect to the controller on the BMS. They perform two main functions:
1: Sense individual cell group voltages
2: Apply a small balance load to any cell group that is higher than the others
So, it’s important to connect these wires to the right spot. The BMS balance leads will be the small white, red, or black wires that looks different from the other connections on a BMS. Unfortunately, BMS manufacturers don't always use the same color scheme for these connections. There is usually a B- and a P- on the other side or if you are lucky, a number by each pin that the BMS sense leads connect to.
Most of the time, these wires are white. If there is a single red wire, then that is more than likely the most positive BMS balance lead. If there is a single black wire, however, then that is more than likely the most negative BMS lead.
Either way, once you determine the orientation of your BMS leads, you can attach them to your cells. Connect the most negative BMS sense wire to the main battery negative. After that, connect the next sense wire to the junction between the first and second cell groups. This can be either the positive of the 1st group or the negative of the 2nd group, as those two points are electrically equal.
The next BMS sense line goes to the junction between the 2nd and 3rd cell groups and so on, all the way up to main battery positive.
The black wire that you connected to P- is your battery pack's protected main battery negative connection. You can route wires from this connection directly to the negative end of your charge and discharge connectors.
STEP 7: Inspect And Voltage Check Your New Ebike Battery
Give all your welds a visual inspection and make sure they all look about the same. If there is a weld that looks particularly light, then reinforce that connection with an extra weld. Ensure that there are no globs of solder that fell anywhere, and make sure that nothing is in an easy position to short out or otherwise connect in any way to anything that it's not supposed to.
Use a multimeter to check the voltage of each one of your cell groups. Then, add up that voltage and write down that number. After that, check the voltage between the main battery positive and the P- connection on your BMS. You should see the sum of all of the voltages in the step above.
If you see 0V or any voltage other than what you are expecting, then the BMS more than likely needs to be activated. To activate a BMS from sleep, all you have to do is attach it to a charger for a short period of time. You don’t always have to do this, but most BMS boards require this step before they will output a voltage.
STEP 8: Add Fish Paper And Tape Up All Of The Connections
Now that you know everything is working the way that it should, it’s time to close up and finalize the battery pack. This is done by applying fish paper and tape in a strategic manner. Use Kapton tape to form a layer over the cell terminals on both sides of the battery. After that, cover any visible nickel strip or cells with a layer of fish paper to fully encapsulate the battery pack.
After creating a layer of fish paper, go around the perimeter of the battery with strapping tape to form a strong bond to hold it all together. If you don't do this step, small vibrations over time can add up and, on a small scale, begin to pull your ebike battery apart.
This problem often manifests itself in the form of small cracks that form in the nickel strip between cells. To avoid this, make sure to tape up your battery very well.
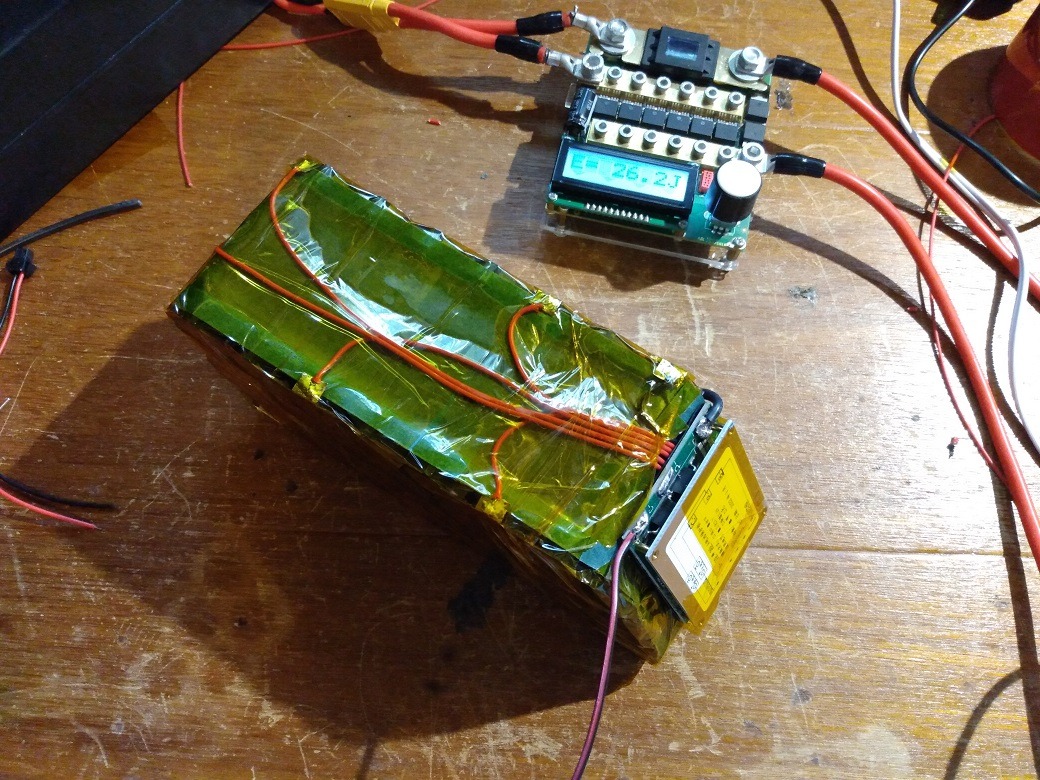
STEP 9: Wrap The Ebike Battery With PVC Heatshrink
No matter how well you tape up your battery, tape alone cannot properly protect an ebike battery from the elements. Large-format PVC heat shrink tubing serves as an excellent way to seal up an ebike battery pack.
PVC heat shrink is sold in its flat width. To find out what size PVC heat shrink tubing your ebike battery needs, all you have to do is measure the length and height and add them up and then add 15 percent. Here is the formula for finding out what size heat shrink you need for a battery:
([battery pack width] + [battery pack height]) x 1.15
For example, if your battery pack is 70mm wide and 90mm tall, you would need heat shrink tubing that has a flat width of 184mm.
(70mm + 90mm) x 1.15 = 184mm
Conclusion
Ebikes are becoming more and more integrated into the average person’s day-to-day life. So, it makes sense for someone to wonder how to build an ebike battery.
The first step in building an ebike battery is determining the number of cells in series and parallel that are required to safely operate your ebike. Before connecting any cells together, it's crucial to make sure that they are all at the same voltage level. After welding the cells together, the BMS sense wires, charge, and discharge connectors must be added. After that, all the connections should be taped up and for best results, make sure to wrap the battery in PVC heat shrink to seal it off from the elements. If you follow those steps, you will be able to build an excellent ebike battery.
We hope this article helped you learn all about how to build an ebike battery. Thanks for reading!
Turn the guide into a real build plan
If this article is part of an actual battery, powerwall, or pack-design project, the next step is usually moving from theory into the calculators and planning tools.
Personal Electric Vehicles
If this article sent you down a deeper rabbit hole, the topic page collects the rest of our guides, explainers, and project notes in this category.
Browse Personal Electric Vehicles