Table of Contents
The BMS is a critical component of any lithium battery. Learning how to attach a BMS to a battery is a critical step in building lithium-ion batteries. A BMS makes a lithium-ion battery safer by preventing the cells from ending up in situations that cause them to rapidly increase in temperature. A BMS also protects the health of your battery cells and extends the overall life of your battery by making sure the cells don't get over-discharged.
Attaching a BMS to a battery is fairly straightforward. The P- connection goes to the negative side of your discharge connector. If you have a separate port BMS, the C- connection will go to the negative side of your charge connector. The positive connection for both charge and discharge is connected directly from the battery to the connectors, as the BMS only controls the negative side of the circuit. The BMS sense leads, or balance leads, need to be installed at both ends of the battery and between each cell group junction.
In this article, we will discuss how to attach a BMS to a lithium-ion battery. We will also go over each connection and explain what they all mean.
Installing A Lithium Battery BMS
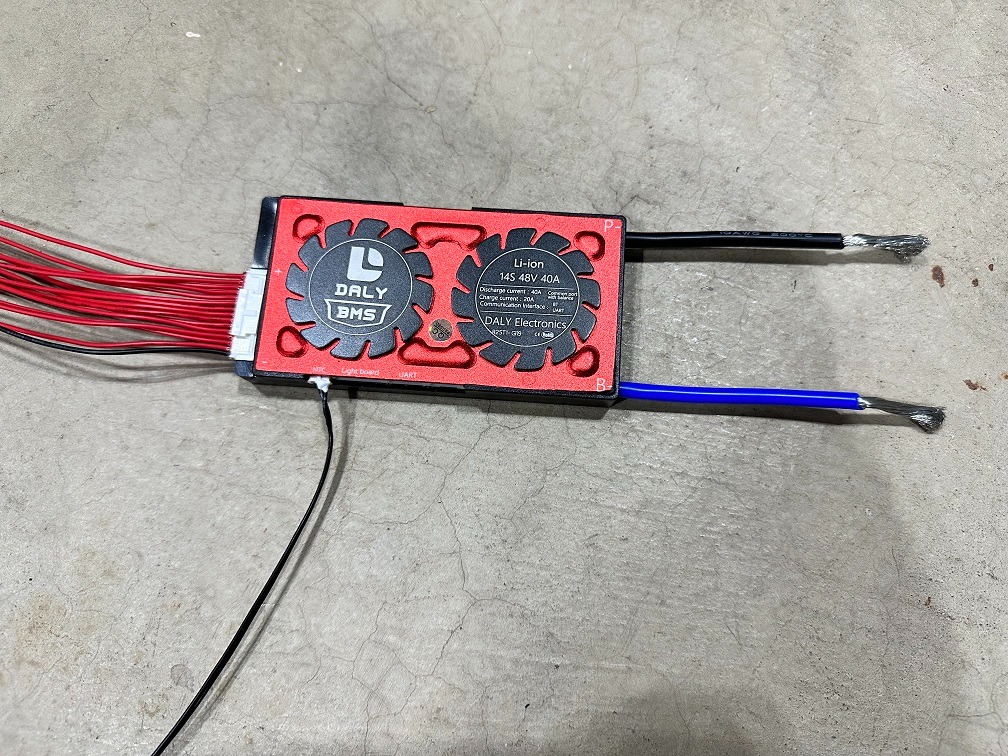
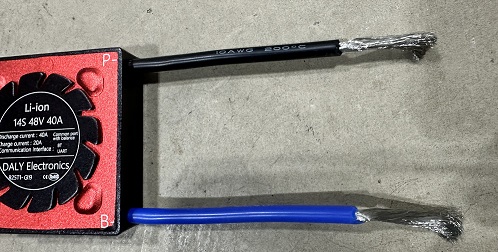
There are two sets of wires to consider when working with a BMS. There are a set of larger thick wires and there are also a higher number of smaller, thinner wires. The larger wires (or solder pads) are for the battery's charging and discharge connection. The smaller, lower current wires are known as the balance leads or balance wires.
It's important to remember that not all BMS are created equally. With that being said, they all do follow the same general format. The main difference between manufacturers is the colors used for the BMS leads and the naming of the different wires or solder pads on the board. For a common port BMS, there will be three large wires or solder pads labeled B- and P-.
Guided BMS Picker Need help picking a BMS, use the tool found at the link below to get guided to the correct BMS. BMS Picker
If you have a BMS that already has the B- wire soldered to the board, then you are in luck. If you are not fortunate to have one of those BMS, you will need to solder the wire yourself. Remember, the B- connection is a high current connection, unlike the BMS balance wires.
So, you will need to make sure to get a large contact surface area between the wire you use and the solder pad on the BMS board. Also, you will need to use a thicker wire than the BMS leads. For a small 10 to 15-amp load, 18 gauge wire will do just fine. For anything high current such as a 20 to 50A load, we recommend using 16 to 10 gauge wire, depending on your needs.
Installing The BMS B- wire
After you solder one end of your B- wire to the BMS, the next step is to attach it to your battery. If you have a pre-soldered BMS, then this is where you begin. The goal is to make the B- wire as short as possible. So, find a place on your battery that has enough room to mount the BMS, but make sure to take the orientation of the BMS relative to the battery's main battery negative connection into consideration.
With some effort, you will be able to find the ideal place to install your BMS. The next step is to carefully solder the B- wire to a portion of nickel between the cells.
The reason for soldering between the cells is to limit how much heat makes its way from the solder joint and into the battery cells. A trick I have been using to build batteries involves soldering the B- connection to a piece of nickel of the same shape and size as the piece of nickel on the battery.
When using this method, take care to not solder over any places that are directly above where the cells will be when you attach the nickel to the battery pack. After soldering the piece of nickel, clean off the bottom to remove any burns or other impurities as a result of the soldering process.
After that, simply place the piece of nickel with pre-soldered B- wire onto the main battery negative of your battery pack and spot weld it in place.
Hooking Up BMS Balance Wires
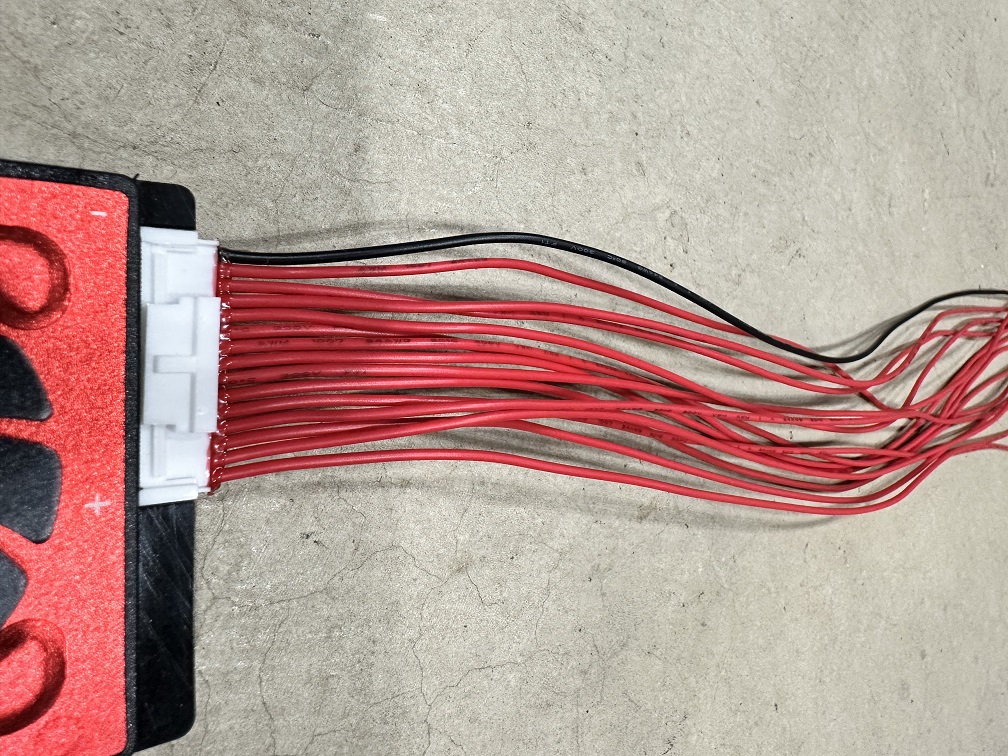
The next step is to attach the smaller, lower current balance wires to their proper locations. Most BMS will have one more balance wire than the number of series cells that it supports. So if you are hooking up a 7S BMS, your BMS will more than likely have 8 balance wires. This, however, is not always the case. So, make sure to check your BMS documentation.
As far as the color, that's all over the place. There seems to be no standard for this. Some BMS manufacturers use all white wires and one red wire to indicate the most positive connection.
Others use all-white wires and one black wire to indicate the most negative connection.
Some use all-white wires with no indication at all, other than on the board. Either way, find out which wire is the most negative and start there. Place that wire on your main battery's negative connection.
Place the next BMS wire on the positive end of that cell, which will be the junction between the 1st cell group and the 2nd cell group. Repeat this pattern all the way down the battery. By the time you get to the end, you should have one wire remaining. This wire connects to your main battery positive connection.
Installing The BMS P- wire
Now that all of the balance wires are connected, it's time to move on to the P- wire. This wire will be the negative charge and discharge connection. Remember, the BMS does perform its control over the battery through the negative battery connection. The positive is passed directly to the load. So, one end of this wire needs to be connected to your main battery positive connection and the other side goes to the charge/discharge connector.
This wire needs to be just as thick as the B- wire, and you can attach it to the battery pack using the same trick described for the B- connection.
Pro Tip: It's a good idea to install your connectors onto your charge/discharge wires before connecting the other end of the wires to the battery/BMS. This makes it so you don't have to be ultra-careful when soldering the wire into the connector. If you don't do it in this order, you have to be extremely careful not to bump the other wire with the soldering iron.
Common Port VS Separate Port BMS
The above information assumes that you are working with a common port BMS. There is another type of BMS, however, called ‘separate port’.
Compared to a common port BMS, a separate port BMS has a dedicated input for charging that is, you guessed it, separate from the discharge port. This type of BMS will have all the same connections as a common port BMS, with the addition of the C- connection.
As you would expect, the C- connection is for the battery charger. The advantage of a common port BMS is that it can independently connect and disconnect the charging and discharging circuits. For example, if you are running a solar setup that is still charging your batteries but the battery reaches its low voltage cutoff, a separate port BMS won't interrupt the charging connection just because it has to interrupt the discharge connection.
More often than not, a separate port BMS will support far lower charging currents than its common port counterpart. This generally means that a smaller wire can be used to connect the C- connection.
Conclusion
Learning how to attach a BMS to a battery is one of the most important lessons you can learn regarding building safe and reliable lithium-ion batteries.
A BMS only controls the negative end of the circuit, so no high-current positive connections need to be connected to the BMS. The P- connection needs to be routed to the negative end of the battery’s discharge connector. For a separate port BMS, the C- connection needs to be wired to the negative side of your charge connector. After that, the BMS BMS sense wires must be connected to both the main - and main + ends of your battery pack and between - to + junction between each cell group.
Installing a BMS really is that simple. The best thing you can do is to study the wiring diagram provided by your BMS manufacturer several times before attempting to wire it up. Go over it until you have a clear understanding of where all the connections go.
We hope this article helped you learn more about how to attach a BMS to a battery. Thanks for reading!
Turn the guide into a real build plan
If this article is part of an actual battery, powerwall, or pack-design project, the next step is usually moving from theory into the calculators and planning tools.
Battery Storage
If this article sent you down a deeper rabbit hole, the topic page collects the rest of our guides, explainers, and project notes in this category.
Browse Battery Storage