Table of Contents
Power banks are more popular than ever. This makes sense because portable electronics are more portable and more power-hungry than ever. So, if you want to keep your portable electronics running as long as you do, you are going to need to know how to build a power bank.
In this article, we will explain how to build a portable power bank with 18650 lithium-ion cells alternatively you can use 21700 cells. This power bank will be able to charge any phone, tablet, or any other device that charges with a USB connection.
Buck Or Boost For DIY Powerbank?
When building a DIY power bank with USB ports, you can go about powering the USB charge portion of the circuit one of two ways. You can either raise the voltage of a single lithium-ion cell or cell group up to 5 volts, or you can lower a higher battery pack voltage down to 5 volts.
Both methods have their pros and cons, so before we explain how to build a DIY power bank, we would like to take the time to explain the advantages and disadvantages of bucking or boosting the voltages.
Boost-Type USB Powerbanks
Boost-type power banks are easy to build because they require fewer parts and the battery pack is less complex. In a boost-style power bank, all you need to do is raise the single-cell or single-cell group voltage to 5 volts. This means that all you need is a small, low-power boost converter, and you are done. This is why there are many boost-type DIY power bank boards on the market.
In this type of setup, the input voltage is from a single-cell or single-cell group where all the cells are connected in parallel. This makes the battery-pack part of DIY power banks that use these boards really simple to construct.
A lithium-ion battery cell has a running voltage of about 2.6 to 4.2 volts. This means when the battery is fully charged, the boost converter doesn't have to do that much work because the desired output voltage is already pretty close to where the input voltage is.
As the battery dies, its voltage is lowered. This causes the tiny boost converter to have to do much more work to achieve a 5-volt output. Towards the end of the battery cycle, when the boost converter’s input is hovering around the 2.8-volt mark, the boost converter has to almost double the voltage to achieve a 5-volt output.
The tiny boost converters that manufacturers include in many DIY power bank boards aren't up to the challenge. This shortcoming manifests itself in a high level of voltage ripple and a failure to reach or stay at 5 volts when the input voltage is lower. Yes they work and will charge your device and there are some boards like this mobile power bank module that do better than others, but if you are really looking to make a high-power, high-performance DIY power bank, then you are going to need to make a buck-type DIY power bank.
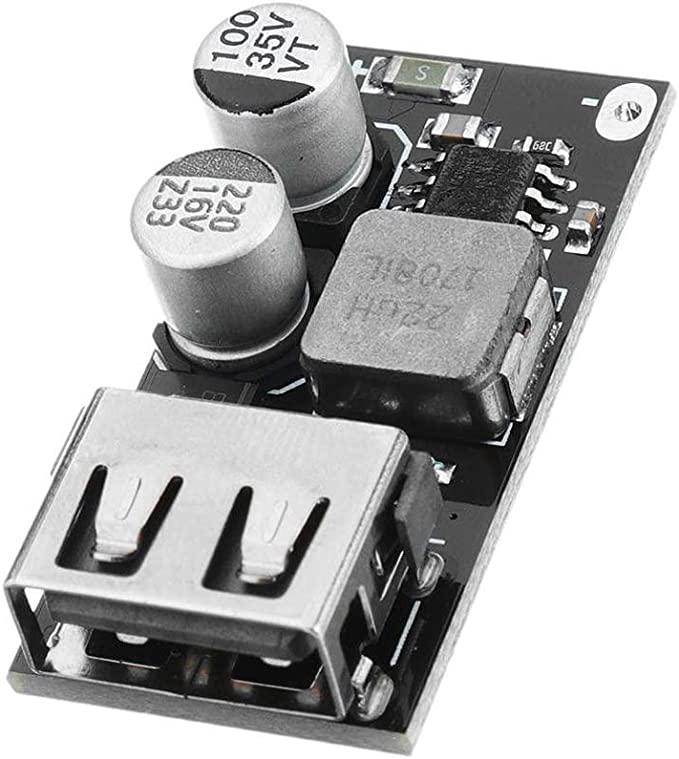
 Boost Powerbank Board
Allows for charge and discharge also, overcharge protection, over-discharge protection, and short circuit protection.
Check Price
Buck-Type USB Powerbanks
A buck-type power bank works by lowering the incoming voltage to 5 volts. Lithium-ion battery cells have a max charge voltage of 4.2 volts. When you put the cells in series, their voltages add up. Generally speaking, 3 lithium-ion cells in series is the minimum series count for a fully functional battery pack.
A 3S lithium-ion battery has a fully charged voltage of 12.6 volts and a dead voltage of around 8.5 volts. This means that no matter what the state of charge of the battery is, it will always have more than enough volts to produce a clean, stable, 5-volt power signal to charge and power all your USB devices.
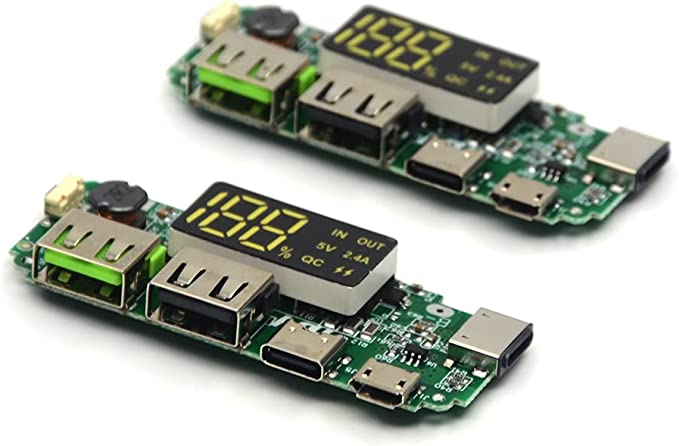
Buck-type USB charge modules come in all shapes and sizes. There are boards that have 4 ports and there are boards that have 2. There are many different modules that just have 1 port on them, and any combination of these modules can be used together in parallel.
Another benefit of a buck-type charger is that the battery pack is a higher voltage than a single cell. If your battery voltage is that of a single lithium-ion cell, then you aren't going to be able to charge your DIY power bank very fast at all. Low voltage high current power supplies are hard to come by for a reason. They are expensive.
With a buck-type configuration, you can charge your DIY power bank at 12 volts.
11.1 volts x 3 amps = 33.3 watts
Put this in contrast to a boost-type DIY power bank that charges at the same 3 amps.
3 amps x 3.7 volts = 11.1 watts
The main disadvantage of a buck-type DIY power bank is that it's more complicated and a little more expensive to build. If you want a high-power, fast-charging DIY power bank and don't mind putting in the extra time and money, then a buck-type is the way to go.
If, on the other hand, you want to build a simple, low-cost solution that will work well and charge reasonably fast, then a boost-type DIY power bank is the best choice for you. We will be covering both in this article, so either way, you’re good.
What Cells To Use In A DIY Powerbank
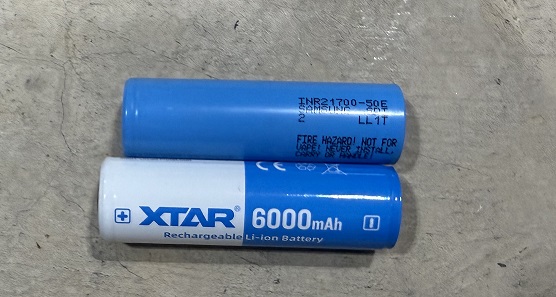
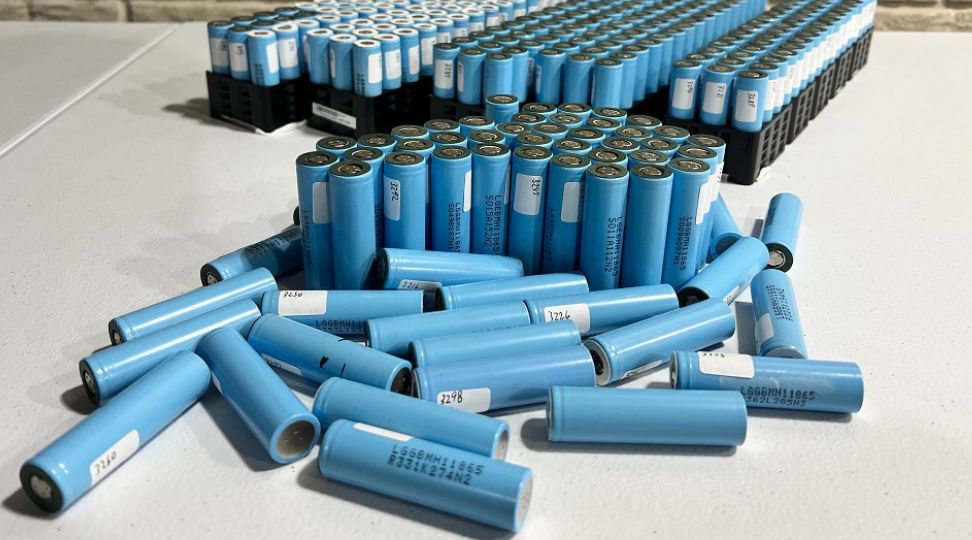
There are many different types of cells that can be used to build a power bank. 18650 cells, 21700 cells, you could even use 32650 LFP cells. Pouch cells are another option. 18650 cells are, by far, the most common type of lithium-ion battery cell and they are the most common type of battery cell to use to build a power bank.
As far as which 18650 cells to use for a power bank, there are many options. Most 18650 cells have around a 2500maH capacity, but there are ones that go as high as 3000maH, 3600maH, or even 4000maH.
High-capacity 18650 cells can get expensive and somewhere around the 3500maH mark, but the good news is that just about any 18650 cells can be used to make a great power bank.
 18650 or 21700 Cells
Battery Hook Up offers new and used cells for sale at amazing prices!
5% Off Right Now
How To Calculate Powerbank Capacity
The capacity of a battery pack is determined by the capacity of the cells used and some math regarding their configuration. Lithium-ion cell capacity is rated in milliamp hours (maH). If a cell has a capacity of 3000mAh, that means it can supply a current of 3 amps for 1 hour. If you have 2 of those cells in parallel, their capacities add up to 6000mah. This means that 2 cells in parallel can supply 6 amps for 1 hour.
Putting battery cells in series increases their voltage but does not change their capacity. A lithium-ion cell has a nominal voltage of 3.7 volts, so if you put two of them in series that would add up to 7.4 volts. So, two 3000mAh lithium-ion cells in parallel make a 6000mAh cell group. Two of those cell groups make a 6000maH 7.4v battery. 7.4 volts multiplied by 6 amp hours will have 44.4 watt-hours of capacity.
Buck-type DIY Powerbank Parts List
18650 or 21700 CellsBattery Hook Up offers new and used cells for sale at amazing prices!
5% Off Right Now
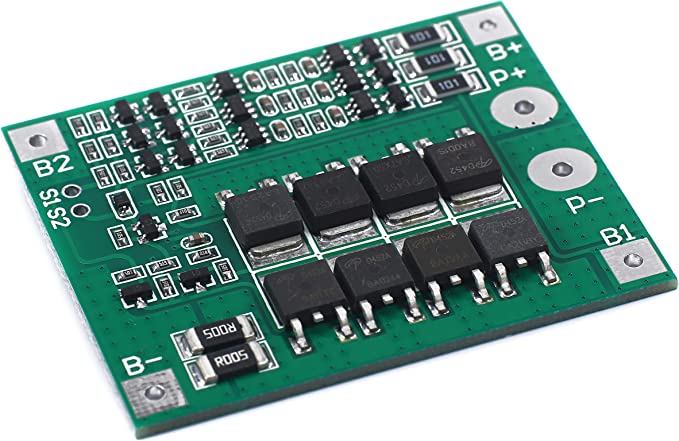 3S BMS
Basic 3S BMS will work great for a powerbank!
Check Price
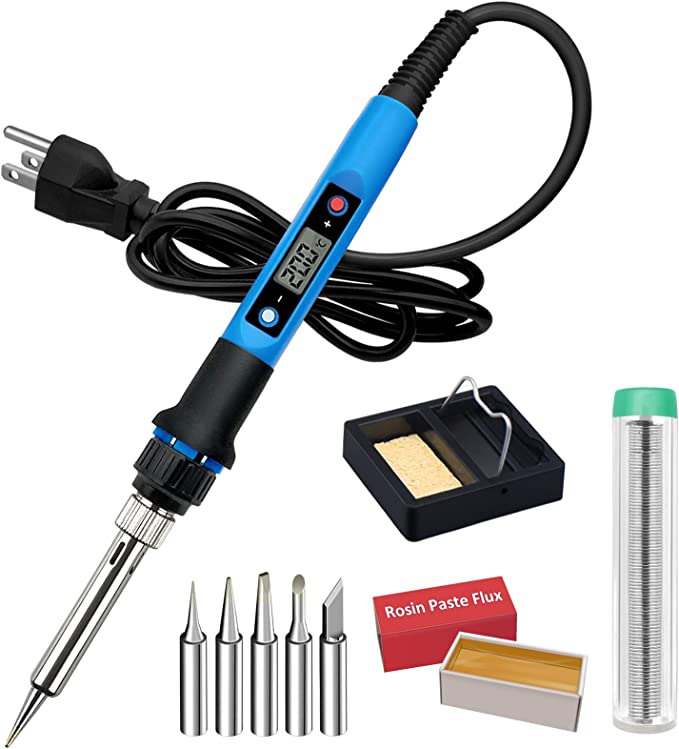 Soldering Iron Kit
Soldering iron kit that has everything you need to solder your BMS to your pack.
Check Price
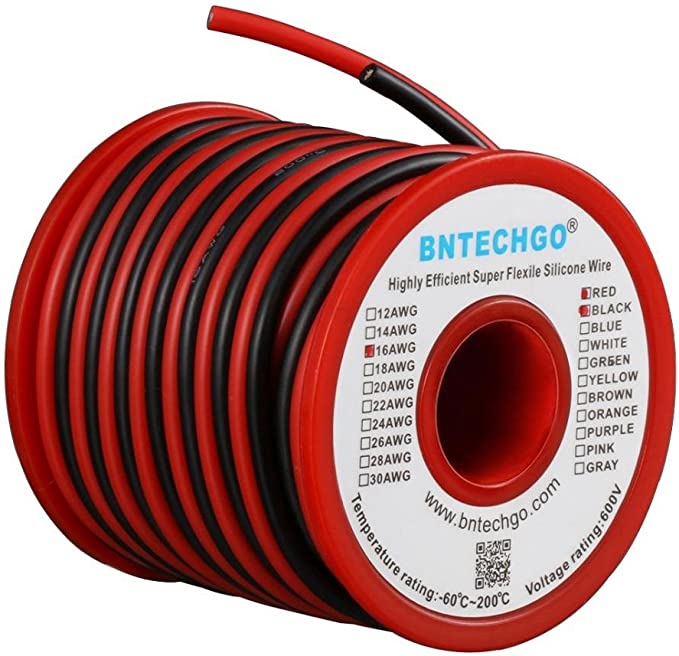 16AWG Silicone Wire
16AWG Silicone wire, you may be able to avoid having to buy this. Just make sure whatever wire you use it can handle the current.
Check Price
 USB Output
This will allow you to charger devices off the pack, you can have as many of these as your pack can handle.
Check Price
Of course, you always have the option of just buying a USB power bank. There are many USB power banks on the market and they come in a wide variety of shapes, sizes, colors, and capacities.
Some power banks use lipo cells so they can be as thin and light as possible, but most USB power banks still use 18650 cells so we are going in that direction with this article.
How To Build A DIY Powerbank [Buck Type]
Step 1: Find some good 18650 cells.
There are plenty of places to get these. You can salvage them from old electronics or you can buy them new.
Step 2: Choose what voltage you want your power bank to be.
Because this is a buck-type converter, you need to choose a voltage that is higher than 5 volts. You don't want to make it too high, though, because how efficient your power bank will be is a function of the difference between the USB charging modules input and output voltages. A 12-volt power bank is a good choice because many things run on the range produced by a 3S lithium-ion battery. This means you can add an auxiliary power output and use your power bank to power lights, drill motors, fans, and more.
Step 3: Weld the cells together with nickel strips.
Do this part carefully as the welding process is permanent. All you have to do is weld the negative side of one cell group to the positive side of the other in a chain. Once you weld 3 groups together like that, you will have a main battery negative connection on one end and a main battery positive connection on the other. All the junction points between that will be where the additional BMS leads go.
Step 4: Install the BMS.
The B- connection on the BMS needs to go to the main negative connection on your battery pack. The B1 connection goes to the junction between cell group 1 and cell group 2, the B2 connection goes between cell group 2 and cell group 3, and the B+ connection goes on the main positive connection on your battery pack.
Step 5: Attach the USB regulator module to the discharge port of the BMS.
The P- connection on your BMS will need to be routed to the negative input of the USB charging module. The positive side of the USB charging module can either be connected to the P+ connection on the BMS or directly to the main battery positive connection.
Step 6: Either tape up or wrap up your DIY power bank or put it in some sort of project box or enclosure.
This part can be a little tricky and it can be helpful if you have a 3d printer. One way or the other, you need to project the boards and other components of your DIY power bank.
Boost-type DIY Powerbank Parts List
18650 or 21700 CellsBattery Hook Up offers new and used cells for sale at amazing prices!
5% Off Right Now
Soldering Iron KitSoldering iron kit that has everything you need to solder your BMS to your pack.
Check Price
16AWG Silicone Wire16AWG Silicone wire, you may be able to avoid having to buy this. Just make sure whatever wire you use it can handle the current.
Check Price
Boost Powerbank BoardAllows for charge and discharge also, overcharge protection, over-discharge protection, and short circuit protection.
Check Price
How To Build A DIY Powerbank [Boost Type]
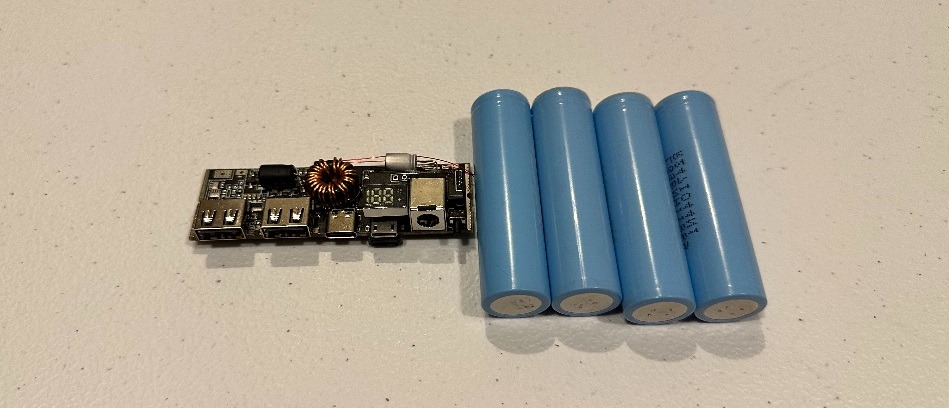
A boost-type DIY power bank is really easy to build. All you have to do is attach the positive and negative on the board to the positive and negative on your battery. The great thing about these boards is that they include everything you need to build a DIY power bank, all you have to add is the cells and casing.
Step 1: Get some 18650 cells.
These boards will work with either 1 lithium-ion cell or several lithium-ion cells in parallel. So, if you want a super compact low-cost DIY power bank, you can make that work with just 1 cell and this board. If, however, you want a more reasonable, higher-capacity DIY power bank, then you are going to want to use at least 4 18650 cells in parallel.
Step2: Weld the cells together
To connect cells in parallel, all you have to do is connect all of their + connections together and all of their - connections together. It's important to make sure that your 18650 cells are within 0.1 volts of each other before you connect them in parallel.
If you are building a single-cell DIY power bank, you will still have to use a spot welder because you have to stop weld tabs so that you can solder connections to the cell.
Step 3: Connect the battery to the mobile power bank module.
There is a connection on the board that is marked B-. That’s where your negative from your battery goes. You will also find a connection on the board marked as B+. You guessed it! That’s where the positive connection coming from your battery goes.
Step 6: Either tape up or wrap up your DIY power bank or put it in a commonly available 3d printed power bank enclosure.
Easy DIY Power Bank
Looking for an easy way to build a DIY power bank, they make kits where all you have to do is put in your 18650 cells of choice and you are good to go!
These are very easy to put together and use however they like customization options of building a power bank from the options above.
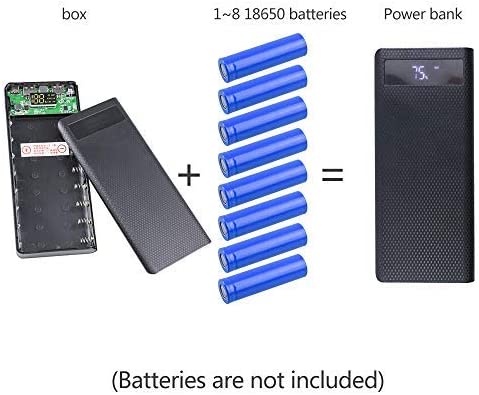 Easy DIY Power Bank Kit
Super simple, buy the kit and some cells, pop them in, and you are done!!
Check Price
How To Recharge A DIY Powerbank
The charger you use to recharge your power bank depends on the number of cells your power bank has in series. A lithium-ion cell has a full charge voltage of 4.2 volts, so if your DIY power bank is using just 1 cell group, you need to charge it at 4.2 volts. If your DIY power bank has 3 series cell groups, you’ll need to charge it at 12.6 volts.
Either way, you have to use a constant current power supply to charge your DIY power bank. We wrote an article about how to build a battery charger that you can check out if you want more information on that.
Not sure which plug to use? See the battery connector guide.
Conclusion
If you want to save money or just make an extra large one, it's good to know how to build a DIY power bank.
To build a DIY power bank, the first step is to find some good 18650 cells. After that, you need to choose what voltage you want your power bank to be. A 12-volt power bank is pretty typical, so you will need at least 3 of those cells in series. Weld the cells together with nickel strips and install the BMS. After that, you need to attach the USB regulator module to the discharge port of the BMS. When that's all done, all you have to do is tape up, wrap up, or put your DIY power bank in some sort of project box.
We hope this article helped you learn everything you needed to know about how to build a DIY power bank. Thanks for reading!
Turn the guide into a real build plan
If this article is part of an actual battery, powerwall, or pack-design project, the next step is usually moving from theory into the calculators and planning tools.
Battery Storage
If this article sent you down a deeper rabbit hole, the topic page collects the rest of our guides, explainers, and project notes in this category.
Browse Battery Storage