Table of Contents
Designing and building a DIY off-grid solar system can be a cost-effective and sustainable way to generate your own electricity. Whether you're living off-grid or simply want to reduce your dependence on the grid, a solar system can provide a reliable source of power. The process of designing and building a solar system can seem daunting, but with the right information, like understanding how to make your own DIY solar system, it’s totally doable.
Building a DIY solar system requires a fair amount of planning and preparation. The first step is to assess your energy needs by determining the total wattage of all the appliances and devices you want to run on the solar system and multiplying that number by the number of hours per day they will be used. Next, research the average sun hours per day in your area and the orientation and angle of your solar panels. This will be crucial in making your own solar system.
Once you have a better understanding of your energy needs and the amount of sunlight you can expect, you can begin to choose the type and size of solar panels, battery bank, DIY solar charge controller, and inverter that will be required for your system. Gather all the necessary components and materials, mount the solar panels in an optimal location, and connect all the components together. Once the battery, controller, and solar panels are all linked up, your DIY home solar will begin to take shape.
Also, it’s good to have a DIY solar monitoring system in place, so you can turn on the assembled system and test it while watching how it delivers voltage and current.
If you want to build your own solar system, you are in the right place! In this article, we will walk you through the process of assessing your energy needs, researching the average sun hours in your area, choosing the right components and materials, and assembling the system.
We will also go over some important considerations such as solar panel efficiency, types of solar panels, battery options, charge controllers, and inverters. As you embark on your DIY home solar journey, these elements will be key to your success.
How To Plan A DIY Solar System
Assess Your Energy Needs
Determining your power needs is the first step in building a DIY off-grid system or creating your own DIY home solar system. To determine your power needs, you need to calculate the total wattage of all the appliances and devices you want to run on the solar system. We also built a solar system and powerwall planner to help you figure out exactly what you need.
Make a list of all the appliances and devices you want to run on the solar system and note their wattage. You can find the wattage of each device by checking the label or the user manual. This will be crucial for making your own solar system.
Multiply the wattage of each device by the number of hours per day it will be used. This will give you the number of watt-hours (Wh) per day for each device. Add up the number of watt-hours per day for all devices to find the total number of watt-hours per day for the entire system.
To determine your power needs for your DIY solar system, you need to calculate the total wattage of all the appliances and devices you want to run on the solar system. This includes lighting, refrigeration, pumps, and any other electrical devices. You can find the wattage of each device by checking the label or the user manual. Once you have a total wattage, you can then calculate the amount of power you will need to generate daily to meet your needs.
For example, let's say you want to run a refrigerator (150 watts), a laptop (50 watts), and a light bulb (60 watts) for 8 hours a day as part of your DIY home solar system.
Refrigerator: 150 watts x 8 hours = 1,200 watt-hours per day
Laptop: 50 watts x 8 hours = 400 watt-hours per day
Light bulb: 60 watts x 8 hours = 480 watt-hours per day
So in this example, the total power needed for the system is 2,080 watt-hours per day. This means that the solar panels, battery bank, solar charge controller, and other components you choose for your system need to be able to generate at least 2,080 watt-hours per day to meet your needs.
1,200 watt-hours + 400 watt-hours + 480 watt-hours = 2,080 watt-hours per day
It is important to note that this is an example and that you should use your own devices and hours of usage to determine your power needs when building your own solar system. Also, it's important to consider that some appliances such as air conditioners, electric vehicles, and electric ovens tend to use a lot of power, and you should take this into account when determining your power needs for your DIY home solar system.
Select The Solar Panels
Based on your power needs for your DIY home solar system, you can calculate the number and size of solar panels required for your system. Solar panels come in a variety of sizes and power outputs, so it's important to select panels that will generate enough power to meet your needs when building your own solar system.
Make sure to research the average sun hours per day in your area and the orientation and angle of your solar panels. Also, examine your property to determine what options you will have in terms of solar panel orientation and angle.
The orientation and angle of the solar panels also play a role in how much power they can generate. Solar panels that are positioned and angled towards the sun will generate more power than those that are not.
The more sun hours per day your area receives, and the better your solar panels are positioned, the more power your DIY solar system can generate.
Calculating the Size and Type of Solar Panels
There are several types of solar panels available on the market, each with its own unique characteristics and benefits. The main types of solar panels include:
- Monocrystalline solar panels: These are made from a single crystal of silicon and are the most efficient type of solar panel, with efficiencies ranging from 15-20%. They are also the most durable and have the longest lifespan. They have a distinctive dark color. These are a popular choice for a DIY home solar system.
- Polycrystalline solar panels: These are made from multiple crystals of silicon and are less efficient than monocrystalline panels, with efficiencies ranging from 12-16%. They are also less durable and have a shorter lifespan than monocrystalline panels. They have a bluish color. They are an affordable option for those making their own solar system.
- Thin-film solar panels: These are made from a thin layer of semiconductor material and are the least efficient type of solar panel, with efficiencies ranging from 7-12%. They are also the least durable and have the shortest lifespan. They have a variety of colors and can be flexible. While not as efficient, they can be a suitable option for specific DIY solar system installations.
DIY Solar System Efficiency
Solar panel efficiency is a measure of how well a solar panel converts the energy from the sun into usable electricity for your DIY home solar system. The efficiency of a solar panel is typically measured as a percentage and is determined by the amount of sunlight that is converted into electricity compared to the amount of sunlight that is received by the panel.
High-efficiency solar panels are able to convert more of the sunlight they receive into usable electricity, which means they can generate more power in a smaller area than lower-efficiency panels. This can be an important consideration when space is limited or when you want to minimize the number of panels you need to install. High-efficiency solar panels can be more expensive than lower-efficiency panels, but they can offset the cost over time by producing more power.
Low-efficiency solar panels, on the other hand, convert less of the sunlight they receive into usable electricity, which means they need more space to generate the same amount of power as a high-efficiency panel. This can be an important consideration when space is not limited, and you have a lot of areas to put the solar panels. Low-efficiency solar panels are less expensive than high-efficiency panels, but they may not produce as much power over time.
When choosing solar panels for a DIY solar array, it's important to consider both the efficiency of the panels and the amount of space you have available. High-efficiency panels can be a good choice when space is limited, but they can also be more expensive. Low-efficiency panels can be a good choice when space is not limited, but they may not produce as much power over time. It's important to keep in mind efficiency is based on the panels being clean, so always keep your solar panels clean for optimal performance when building your own solar system.
How Many Solar Panels Are Needed For A DIY Solar System?
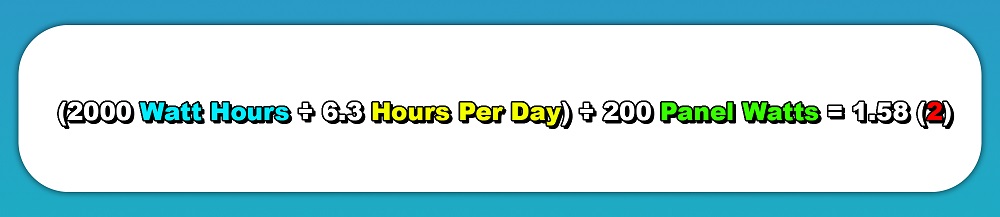
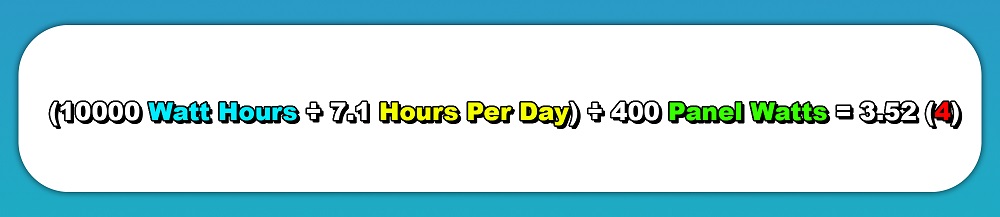
Once you have considered these factors, you can use the following formula to calculate the number of solar panels you need:
Number of Panels = (Total Daily Power Needs (watt-hours) / Average Sun Hours per Day) / Panel Wattage
Choosing The Battery for your Solar System
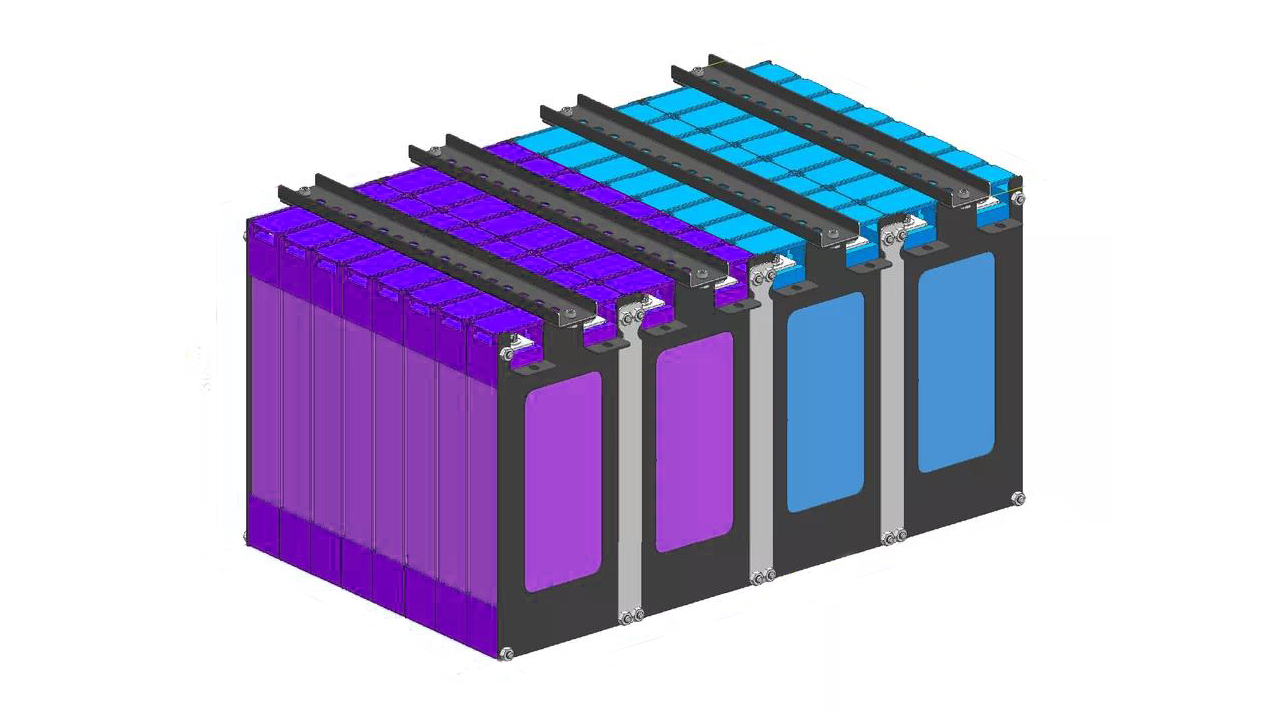
The battery bank is used to store the energy collected by the solar panels. You need to select the type and number of batteries that will store the energy. Lead-acid batteries are the most common type used in off-grid solar systems, but lithium-ion batteries are becoming increasingly popular as well. We wrote up a full guide on building a DIY powerwall which goes into great detail on the power storage aspect of building a solar system.
Choosing the best battery for a DIY solar system is an important step in the planning process. The battery is responsible for storing the energy generated by the solar panels, so it is crucial to choose a battery that is suitable for your needs and budget. Here are some common cell chemistries and their characteristics that you can consider when choosing a battery:
Lithium Ion Batteries
These batteries are becoming increasingly popular in off-grid solar systems. They are lightweight, have a long lifespan, and require little maintenance. They come in different types such as:
- Lithium Ferrous Phosphate (LFP): These batteries are known for their safety, long lifespan, and low cost. They have a low energy density, which means they are not as efficient as other types of lithium-ion batteries.
- Lithium Nickel Manganese Cobalt Oxide (LiNiMnCoO2 or NMC): These batteries have a higher energy density than LFP batteries, which means they are more efficient. They are also more expensive than LFP batteries.
- Lithium Nickel Cobalt Aluminum Oxide (LiNiCoAlO2 or NCA): These batteries have the highest energy density of all lithium-ion batteries, which makes them the most efficient. They are also the most expensive of all lithium-ion batteries.
Pros:
- Longer lifespan: Li-ion batteries can last up to 10-15 years, whereas lead-acid batteries typically last around 5-7 years.
- Higher energy density: Li-ion batteries can store more energy in a smaller space, which makes them ideal for smaller systems or those with limited space.
- Lower maintenance: Li-ion batteries require less maintenance than lead-acid batteries and do not need to be regularly topped off with water.
- Higher efficiency: Li-ion batteries have a higher charge/discharge efficiency, which means they lose less energy during charging and discharging.
Cons:
- Higher cost: Li-ion batteries are more expensive than lead-acid batteries.
- Requires specific charging/discharging cycles: Li-ion batteries require special charging and discharging cycles to maintain their optimal performance, which can make them more complex to operate and maintain.
Lead-Acid Batteries
Lead acid batteries are still the most common type of batteries used in off-grid solar systems. They are relatively inexpensive and have a long lifespan, but they do require maintenance. They come in different types such as:
- Flooded Lead-acid batteries: These are the most traditional type of lead-acid batteries. They are relatively inexpensive but require frequent maintenance, such as checking and refilling the water levels.
- Sealed Lead-Acid (SLA) batteries: These batteries are also known as "maintenance-free" batteries. They are sealed, which means they don't require water refills. However, they are less efficient than flooded lead-acid batteries.
- Absorbed Glass Mat (AGM) batteries: These batteries are a type of SLA battery. They have a higher efficiency than traditional SLA batteries, but they are more expensive. They are also sealed, which means they don't require water refills.
Pros:
- Lower cost: Lead-acid batteries are less expensive than lithium-ion batteries.
- Widely available: Lead-acid batteries are widely available and easy to find, making them a good option for those who want to build their own solar system.
- Fewer special requirements: Lead-acid batteries do not require specific charging/discharging cycles, making them easier to operate and maintain.
Cons:
- Shorter lifespan: Lead-acid batteries typically last around 5-7 years, whereas Li-ion batteries can last up to 10-15 years.
- Higher maintenance: Lead-acid batteries require regular maintenance, such as topping off with water, to maintain their optimal performance.
- Lower energy density: Lead-acid batteries can store less energy in a smaller space, which makes them less ideal for smaller systems or those with limited space.
- Lower efficiency: Lead-acid batteries have a lower charge/discharge efficiency, which means they lose more energy during charging and discharging.
LFP vs NMC For DIY Solar System
LFP batteries have a longer lifespan and are more stable, making them a good choice for long-term energy storage. They also have high thermal stability, making them less prone to overheating. However, LFP batteries have a lower energy density compared to NMC batteries, so they may be larger and heavier for the same amount of storage capacity.
On the other hand, NMC batteries have a higher energy density, which means they can store more energy in a smaller and lighter package. They also have a high power density, making them well-suited for high-power applications like grid-tie inverters. However, they have a shorter lifespan and are more prone to overheating compared to LFP batteries.
Ultimately, the best choice between LFP and NMC batteries will depend on your specific needs and the use case of your DIY solar system. If long-term energy storage is a priority, LFP batteries may be a better choice. If high-power applications and a smaller, lighter package is a priority, NMC batteries may be a better choice.
How To Choose A Battery Size For A DIY Solar System
When choosing a battery for a DIY solar array, you should consider factors such as cost, lifespan, efficiency, maintenance requirements, and weight. The overwhelming majority of the time, lead acid will have an initial lower cost but a larger total cost of ownership.
To calculate the size of a battery needed to power a home, you will first need to determine the total daily energy consumption of the home. This can be done by adding up the wattage of all appliances and devices that will be powered by the solar system and multiplying that number by the number of hours per day they will be used.
For example, if a home has the following appliances:
Refrigerator: 150 watts x 4 hours/day = 600 watt-hours/day
Lights: 50 watts x 4 hours/day = 200 watt-hours/day
TV: 100 watts x 4 hours/day = 400 watt-hours/day
Computer: 100 watts x 4 hours/day = 400 watt-hours/day
Total daily energy consumption = 600 + 200 + 400 + 400 = 1600 watt-hours/day
Next, you will need to determine the number of days of autonomy you want the battery to have. This is the number of days that the battery can power the home in case of no sunlight.
For example, if you want the battery to have 3 days of autonomy, you will need a battery that can store:
1600 watt-hours/day x 3 days = 4800 watt-hours
If the home's daily energy consumption is 2000 watt-hours and you want the battery to have 4 days of autonomy then the required battery capacity would be:
For a home with a daily energy consumption of 10,000 watt-hours and a target autonomy of 3 days, a lithium-ion battery with a capacity of 30,000 watt-hours (10,000 x 3) would be needed.
For a home with a daily energy consumption of 15,000 watt-hours and a target autonomy of 2 days, a lithium-ion battery with a capacity of 30,000 watt-hours (15,000 x 2) would be needed.
For a home with a daily energy consumption of 20,000 watt-hours and a target autonomy of 5 days, a lithium-ion battery with a capacity of 100,000 watt-hours (20,000 x 5) would be needed.
Finally, you will need to determine the depth of discharge (DOD) of the battery. This is the percentage of the battery's capacity that can be used before it needs to be recharged.
For example, if you want to use 80% of the battery's capacity before recharging it, you will need a battery with a capacity of:
4800 watt-hours / 0.8 = 6000 watt-hours
Choose The Solar Charge Controller
A solar charge is responsible for regulating the flow of electricity from the solar panels to the battery bank. It ensures that the batteries are not overcharged or undercharged, which can damage the batteries and reduce their lifespan. There are two main types of solar charge controllers PWM and MPPT its important to consider both options.
When choosing a solar charge controller for a DIY solar array, you should consider the following factors:
Voltage
Ensure that the charge controller is compatible with the voltage of your solar panels and battery bank. If the voltage is not compatible, the charge will not function correctly and could even cause a fire!
The most common voltages for DIY solar systems are 12V, 24V, and 48V. A 12V system is suitable for small, basic systems and is usually used for powering lights, small appliances, and charging devices.
A 24V system is more powerful and is suitable for powering larger appliances and devices. A 48V system is suitable for larger, more complex systems and is typically used for powering multiple appliances and devices at once. It's important to note that the higher the voltage, the more efficient the system will be, but also the more expensive it may be.
Current
It’s crucial to ensure that the charge controller is rated for the current output of your solar panels. If the current rating is too low, the charge controller may not be able to handle the amount of electricity being generated by the solar panels, which can cause damage to the system. If the current is too high, then you are wasting money if you don’t need the additional capacity.
Battery Chemistry
It's important to ensure that the charge controller is compatible with the type of battery you are using. Different battery chemistries require different charging voltages and methods, so it's important to use the correct type of charge controller to ensure that the battery is being charged correctly and safely.
Temperature compensation
Some charge controllers include temperature compensation, which adjusts the charge voltage based on the temperature of the battery. This can help prolong the life of the battery by preventing overcharging or undercharging, which can occur at different temperatures.
Display and monitoring
Most charge controllers include a display that shows the voltage, current, and the state of charge of the battery. This can be helpful for monitoring the performance of the system, knowing when the battery is fully charged, and detecting any issues that may occur. It can help to ensure that the system is working efficiently.
The formula to find the right power level for your charge controller is:
Power level = Current rating of your solar panel x Voltage of your solar panel
For example, if you have a solar panel that has a current rating of 10 amps and a voltage of 12 volts, the power level of the charge controller you would need would be:
Power level = 10 amps x 12 volts = 120 watts
So the charge controller should technically be at least 120 watts, but it’s always best to over budget by about 20 percent so that you are not running your equipment at its limits.
Choosing DIY Solar System Inverter
An inverter is used to convert the DC power stored in the batteries to AC power that can be used to run appliances. There are different types of inverters, like a pure sine wave and modified sine wave, that you can choose from. When choosing an inverter for a DIY solar system, you should consider the following factors:
- Voltage: Make sure the inverter is compatible with the voltage of your battery bank.
- Current: Make sure the inverter is rated for the current output of your appliances and devices.
- Sine wave: There are two main types of inverters: pure sine wave and modified sine wave.
- Pure sine wave inverters produce a cleaner, more stable power output, which is better for sensitive electronic equipment such as medical devices, computers, and home theater systems. They are also more expensive than modified sine wave inverters.
- Modified sine wave inverters produce a less stable power output, and they are not recommended for sensitive electronic equipment, but they are less expensive than pure sine wave inverters. They are suitable for basic loads such as lights, fans, and refrigerators.
- Size: Based on your power needs, you need to select the size of the inverter. If you are planning to run several appliances, you will need a larger inverter than if you are only running a few devices.
- Efficiency: Efficiency refers to how well the inverter converts DC power to AC power. High-efficiency inverters will convert more DC power to AC power, which can save you money in the long run by reducing the amount of power you need to generate.
- Cost: Inverters can vary widely in price, so it's important to choose an inverter that fits your budget while still meeting your needs.
Generally speaking, a pure sine wave inverter is always the best option unless cost is the most significant factor.
How To Build A DIY Solar System Step By Step
So, now that you know all the details, here is a step-by-step general overview of how to build a DIY solar system:
Step 1: Gather all the components and materials needed for the system.
It’s important to have all the necessary components and materials on hand, including solar panels, battery bank, charge controller, inverter, wiring, and mounting hardware to build your DIY solar system before you get started.
Step 2: Mount the solar panels on a suitable location that has good sunlight exposure, making sure to follow the manufacturer's instructions.
Mounting the solar panels on a suitable location that has good sunlight exposure is crucial to ensure that your solar panels are receiving the maximum amount of sunlight possible. It is important to follow the manufacturer's instructions when mounting the solar panels to ensure that they are installed correctly and safely.
Step 3: Connect the solar panels to the charge controller using the appropriate wiring. Using the right wiring to connect the solar panels to the charge controller is essential to ensure the most efficient and cost-effective operation of your DIY solar system.
Making these connections are simple. All you have to do is connect the positive output terminal of the solar panel to the positive input terminal of the charge controller. Then, connect the negative output terminal of the solar panel to the negative input terminal of the charge controller.
Step 4: Connect the battery bank to the charge controller. Make sure to use the correct type of battery and to follow the manufacturer's instructions.
Connect the positive (red) cable from the charge controller to the positive terminal of the battery bank. Inspect the connection to ensure that it is securely attached to the terminal. Then, repeat that process for the negative (black) wire. Again, make sure that the cable is securely attached to the terminal.
Step 5: Connect the inverter to the battery bank. Connecting the inverter to the battery bank will allow your DIY solar system to power 120V AC appliances and devices.
This process will be the same as connecting the battery and solar panel, but with just a different input. So, simply attach the positive and negative connections to the load connection on the charge controller and you will be good to go.
Step 6: Turn on the inverter and test the system by turning on the appliances one by one. Check for any issues or problems.
Testing the system by turning on the appliances one by one is important to ensure that your solar system is working correctly. It is important to check for any issues or problems and make any necessary adjustments to the system.
Step 7: Make any necessary adjustments to the system, such as adjusting the angle of the solar panels or the charge voltage on the charge controller.
Making any necessary adjustments to the system, such as adjusting the angle of the solar panels or the charge voltage on the charge controller, is important to ensure that your solar system is working efficiently and effectively. It is important to periodically check the system and make any necessary adjustments to ensure that it is working at its optimal performance.
Step 8: Once the system is working properly, you can start using the power generated by the solar panels to run your appliances and devices. It is important to monitor the system and make any necessary adjustments to ensure that it continues to work efficiently and effectively. Additionally, it is important to maintain and service the system regularly to ensure that it continues to perform well and has a long lifespan.
How To Test A DIY Solar System
Once the system is assembled, you should test the system by turning on the appliances one by one and checking for any issues or problems. This will give you an idea of how well the system is working and if any adjustments need to be made:
Turn on the inverter: Start by turning on the inverter and making sure it is working properly. The inverter is responsible for converting the DC power stored in the batteries to AC power that can be used to run appliances.
Test the solar panels: Next, test the solar panels to ensure they are generating power. You can use a multimeter or a voltage meter to measure the voltage and current output of the solar panels. Make sure that the voltage and current output match the specifications of the solar panels.
Test the battery bank: Check the voltage and current of the battery bank to ensure they are within the recommended range. You can use a multimeter or a voltage meter to measure the voltage and current of the battery bank.
Test the charge controller: The charge controller regulates the flow of electricity from the solar panels to the battery bank. It ensures that the batteries are not overcharged or undercharged. Test the charge controller to make sure it is functioning properly by measuring the voltage and current of the battery bank while the solar panels are generating power.
Test the load: Finally, test the load by turning on the appliances one by one and monitoring the voltage and current of the battery bank. Make sure that the voltage and current remain within the recommended range when the appliances are turned on.
Finalize the testing by checking for any issues or problems. If everything is working properly, you can start using the power generated by the solar panels to run your appliances and devices.
Conclusion
Designing and building a DIY solar system is a great way to generate your own power, save money on your energy bills and be more self-sufficient. The process of building a DIY solar system begins with assessing your energy needs, then designing and implementing a DIY solar system.
To build a DIY solar system, you need to determine the total wattage of all the appliances and devices you want to run on the solar system, and multiply that number by the number of hours per day they will be used. Then. you will need to research the average sun hours per day in your area and the orientation and angle of your solar panels. This will help you determine how much power your solar panels can generate. After that, you can choose the type and size of solar panels, battery bank, charge controller, and inverter that will be required for your system. Once you have all the necessary components and materials, the next step is to mount the solar panels in an optimal location that has good sunlight exposure, making sure to follow the manufacturer's instructions. After that, you will need to connect the solar panels
We hope this article provided everything you needed to know about how to build a DIY solar system, thanks for reading!
Turn the guide into a real build plan
If this article is part of an actual battery, powerwall, or pack-design project, the next step is usually moving from theory into the calculators and planning tools.